
 Home
 User Guide
 Developers
 Payment Gateways
 Integrations & Tools
 Site Usage
 Troubleshooting
Know Roller Screen
Find the user with the search on the left. The list on the right is located in the defined roles. Role user’s role in the card drag and drop you can get a gift.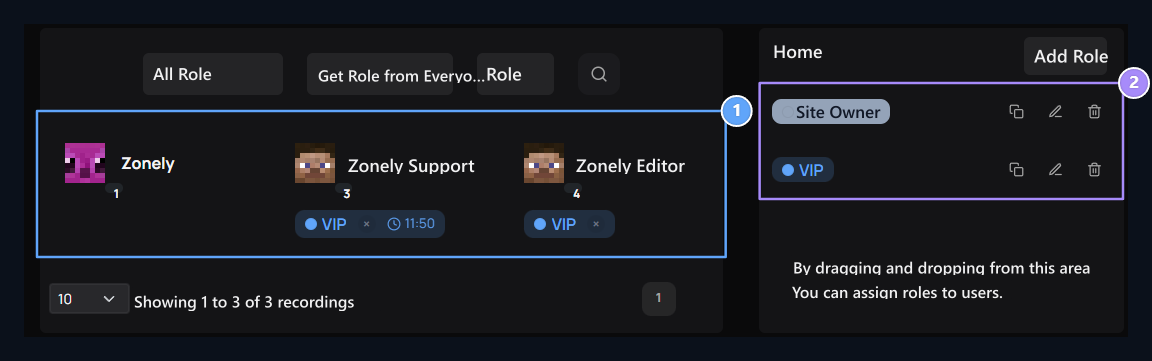
1. User cards
Find an account and check out the assigned roles.
2. Definition roles
Drag the user to the Rolu; open editing and copying transactions from the list.
Top Cast A Role, Give Everyone A Role and Get A Role From Everyone buttons are for assigning or re-entering existing roles to users. To prepare a new role Add Role Press the button.
Prepare the name and appearance of the role
Add Role On screen View, Permissions, Time, Game Authorization, Discord and HTML tabs are available. First View Click on the role in the preview on the tab and for example, News type. The user name on the side shows how changes you do.Featured color and style
Cow Styleformats role tag next to the user name. Select a color ready from the pallet or Drop Select custom color with button. Tags The button returns to default color.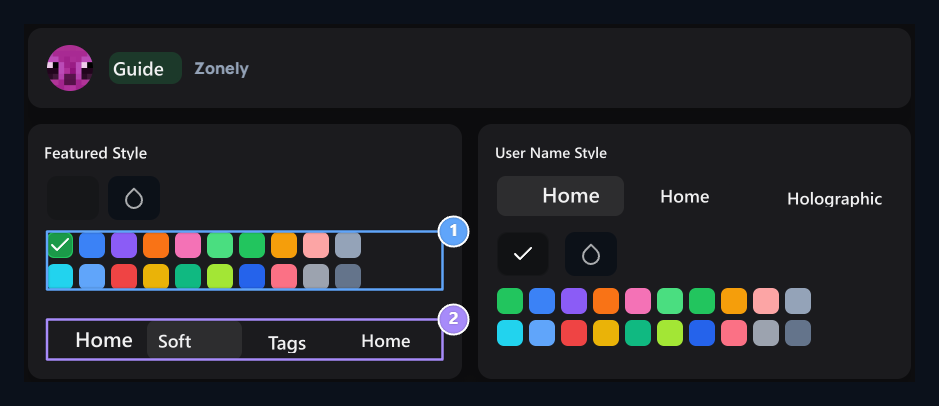
1. Featured color
Choose ready or custom color for role label.
2. Featured style
Select the appearance of Solid, Soft, Striped or Gradyan.
As color and style changed, preview on the top is renewed. Click the tag on the preview to change the role name.
Select one color for user name
User Name Style → Solidshows the account name with one color. Ready-made pallet, drop and default color buttons change the color of the user name in this field.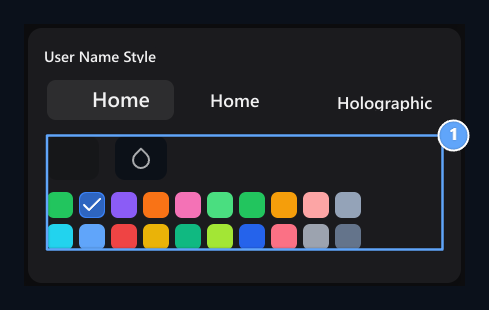
1. User name color
Set single color for account name in solid style.
Create two-color transition
Gradient Two-color presets are opened when selected. You can choose a ready-to-pass or set the start and finish colors separately with two drop buttons.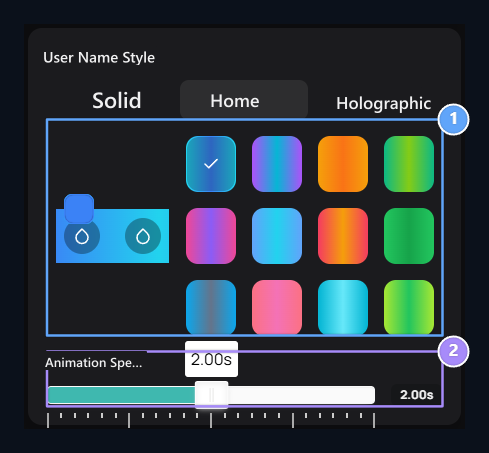
1. Two-color switch
Select ready pass or start and finish colors.
2. Animation speed
The transition slows down as the second; 0 stops the movement.
Adjust the holographic view
HolographicThe user uses three color stops named. Change the color of each stop from its drop button and check the result from preview.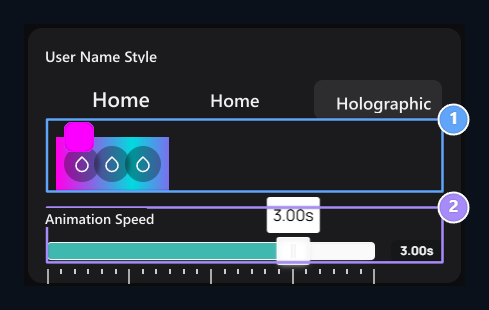
1. Holographic appearance
Separately select three color stops.
2. Movement time
Set the speed of multi-color passage from this area.
Add badge and drop-down message
BadgeThe picture shown next to the user name. Select your file by printing it to the visual field or the installation icon. The file selection starts loading; you can follow the progress from the percentage on the visual. × The button removes the selection of badges available.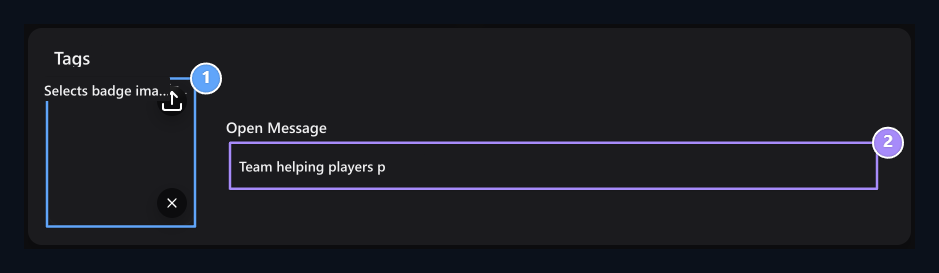
1. Badge visual
Select the picture to show next to the username.
2. Open message
Write the description to show when it comes to the badge.
Select Avatar Frame
Avatar frame open the space and select the frame you want from the list. Unframed Removes the option frame. The choice appears in the small picture and name field; the preview on the top is also updated.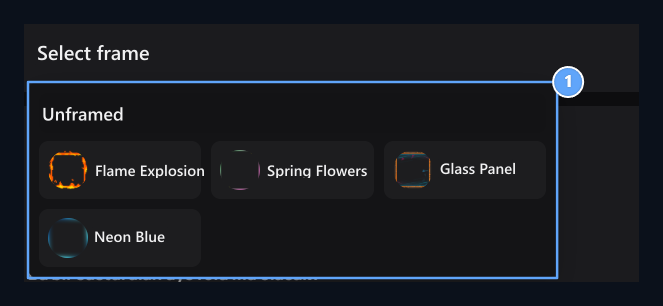
1. Avatar frame
Select a frame; Remove selection with your frame.
Select the sequence and role options
Rowis the numerical ranking weight of the role. You can also change ranking by dragging roles in the main list. Access to the management panel, Permits The selections are determined on the tab.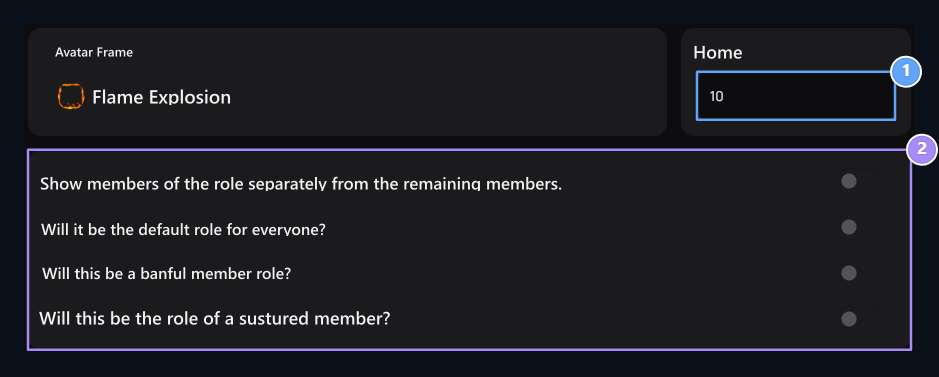
1. Row
Determine the weight of the role numerical ranking.
2. Role options
Separate views, set by the purpose of the role of the default, prohibited and the unsued member options.
Select management panel permissions
Permits Type the area to be managed to search on the tab and tick the corresponding boxes. For example support team Support search Live Support Manageable You can choose the permission.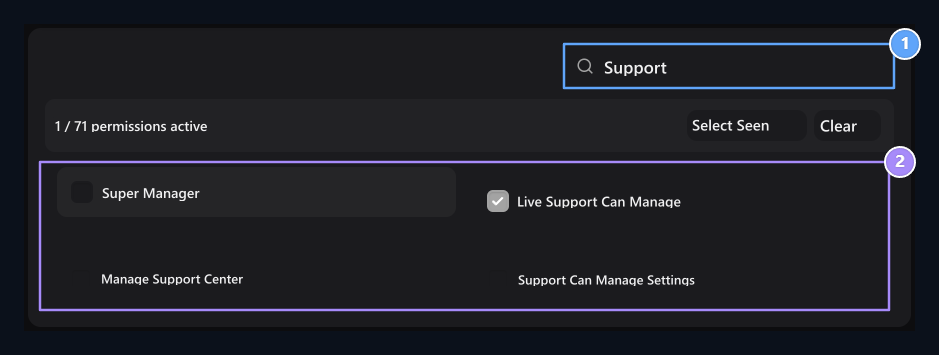
1. Permission search
Find the domain to be managed.
2. Permission selection
Check the management areas that need to access the role.
Super Manager
Super Manager When the existing management permissions are selected. You can open this option for the role that will use all management fields.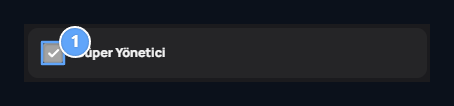
1. Super Manager
Selects all available management permissions.
Set the role time
Duration On the tab Unlimited or Limited Select. Type the time to the space opened in the limited option. For example 10mmeans 10 minutes.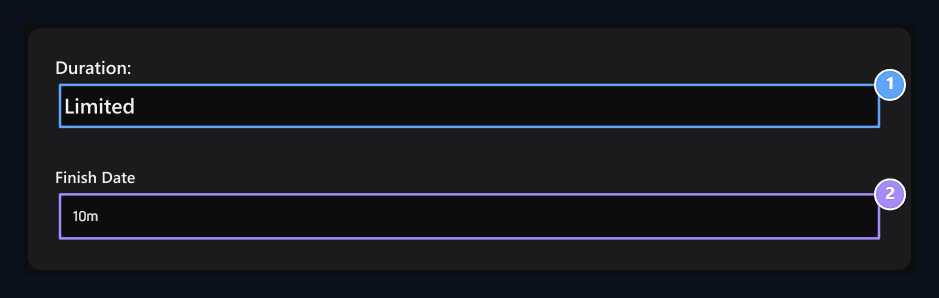
1. Time type
Select Unlimited or Limited.
2. Role time
Type time for limited role; 10m means 10 minutes.
Prepare game authorizations
Before you use game roles with the site LuckPerms link prepare. Check the site and the game server connected to the same database, the correct table forward. Game Authorization on the tab Cow Style and User Name Style Type Minecraft formatting to areas. For example to stand out **&a[Rehber]**for user name &r You can use it. See preview under the consequent areas.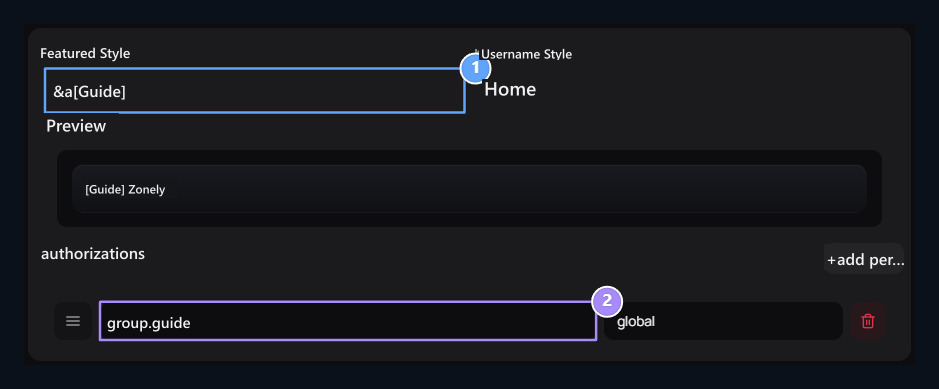
1. Game prefix
Write the prefix of the role in Minecraft formatting.
2. Authorization permissions
Set the scope that LuckPerms nodes and will be valid.
Connect the role of the site to the role of Discord
Discord to use role mapping Discord Bot Prepare and link Add-ons → Discord Match Activate the plugin. Bot Discord connects your server to the site; the account pair connects the member with its own Discord account.- Discord Bot guide add bot to your server with steps and Link Token → /esle Complete the link.
- Discord account matching steps Activate the plugin and review how the user will connect his/her account.
- Home Discord Open the tab. Discord Role Select the opposite of this site role from the list on the server.
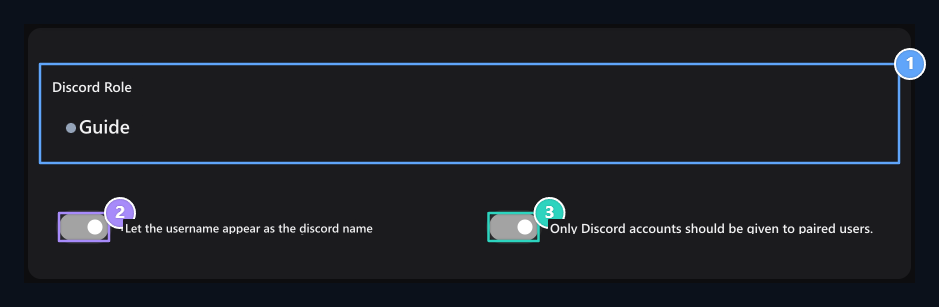
1. Discord role
Select the opposite of the site role on the Discord server.
2. Sync user name
Select the use of the site as the Discord name of the user name.
3. Matched account condition
Do not require the matching of the personal Discord account for the role.
The user must also be member of the connected Discord server. Check the link to the correct server of the bot if the list is empty. Although it does not data despite the role looks Controls in Discord Bot guide Check out.
Edit and save HTML view
HTML You can edit the special HTML presentation on the site of the role tab. Check the result of the code from the preview on the top. RestoreRecreate HTML code from existing settings on the View tab.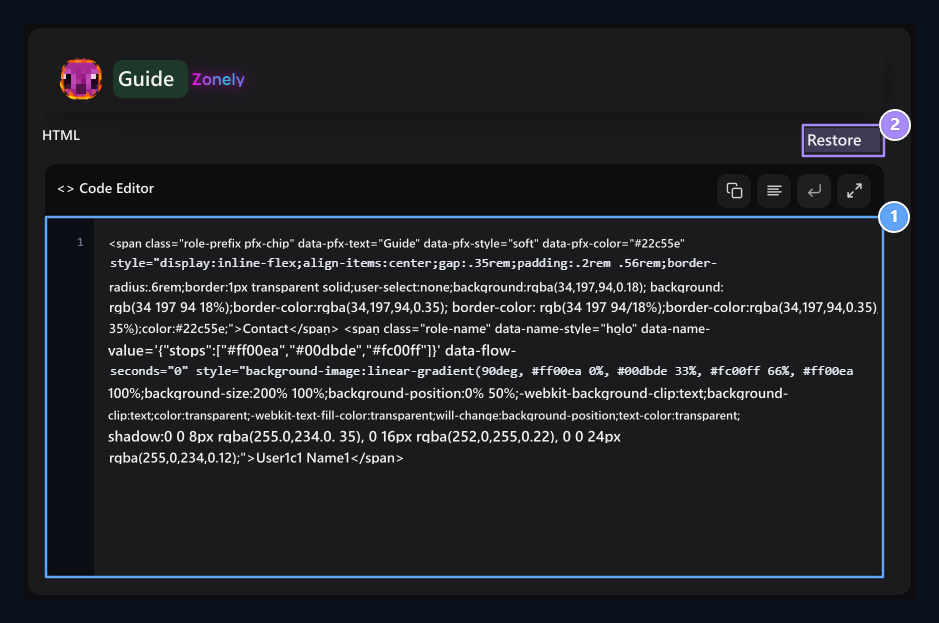
1. HTML view
Edit and preview the special HTML presentation of the role.
2. Restore Back
Use this button to recreate the appearance.
Role a user
Main screen Cast A Role Press the button. Search and select the user; then select one or multiple roles to be given. Give button assigns the selected roles into this account.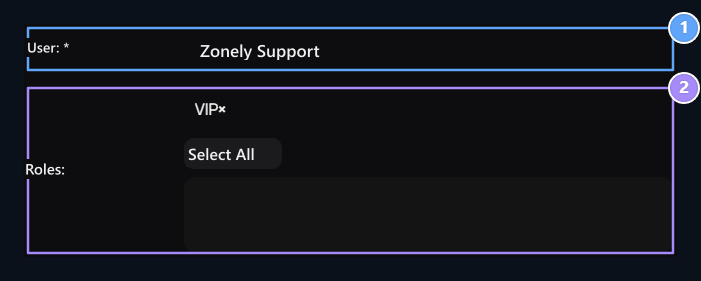
1. User
Select the role-to-play account.
2. Rollers to be given
Select one or more roles and take into account with Ver.
Role all users
Give Everyone A Role Open the button and select the assigned roles. Select All marking all roles; Clear Selection Removes the selected roles. Apply The button gives all the accounts of the roles you choose.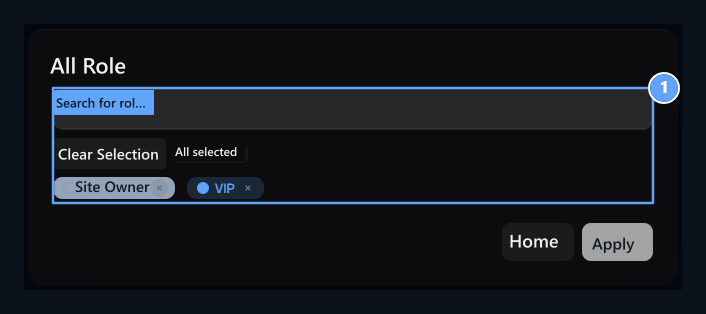
1. Role All
All users are given to the following roles with the Apply.
Take part of all users
Get A Role From Everyone Open the button and select the roles to be restored. Remove The button removes the selected roles from all users. Cancelcloses the window from the application.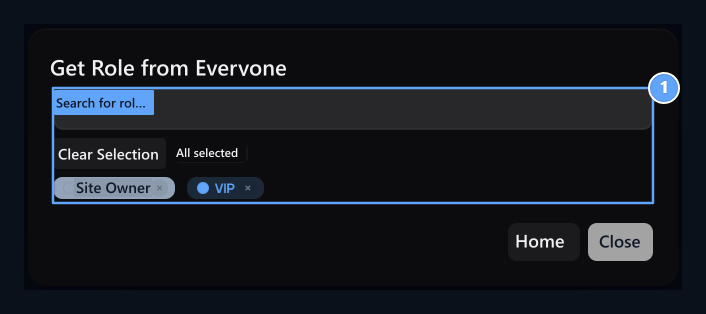
1. Role of Everyone
Remove the roles you choose from all users.
See the remaining role time of the user
Find user card on the home screen. Next to a periodic role Come on the clock icon. In the pop-up information box EndÅ Date and Remaining time appears. This time indicator is not available indefinite roles.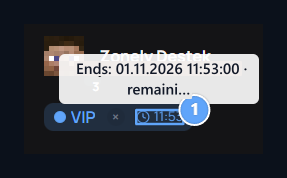
1. The remaining role time
See the date of finish and remaining time by coming on the watch icon.

Non-service authorization
Give your long or time-free gaming authority with LuckPerms and follow the remaining time on the user.