
 Home
 User Guide
 Developers
 Payment Gateways
 Integrations & Tools
 Site Usage
 Troubleshooting
Find Notification
Add Webhook opens new notification screen. Find the registration from the search area; edit it from the process menu on the line. Check the type of event in the list and the registration information together.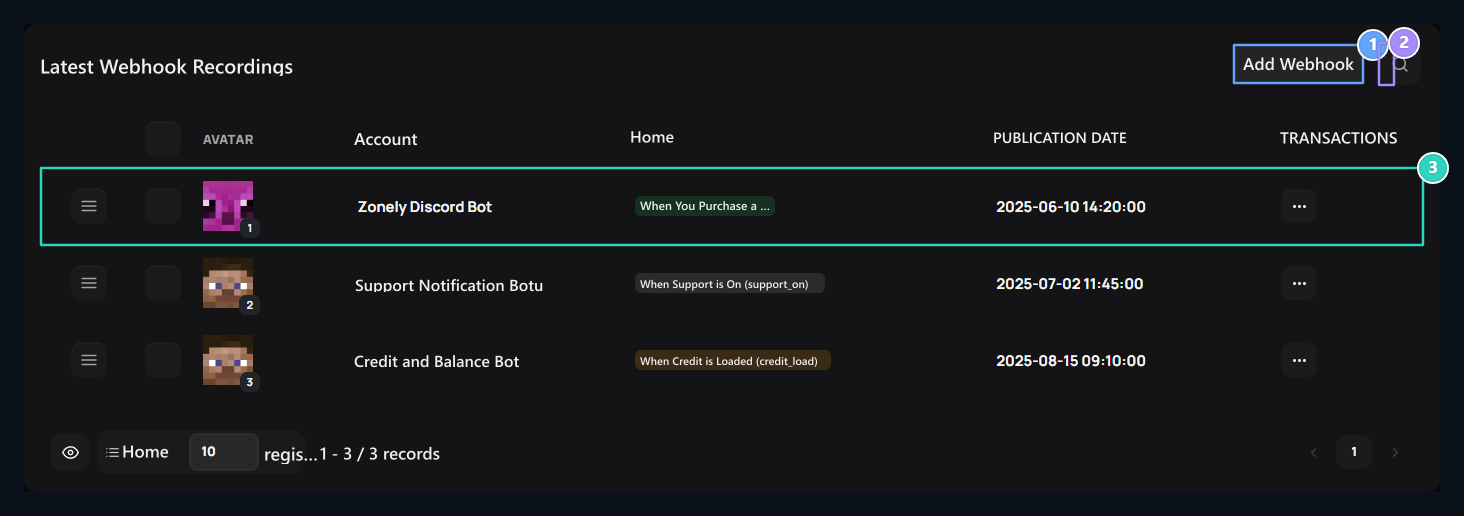
1. Add Webhook
Open the drawer to identify a new Discord or external webhook channel.
2. Search Channel
Quickly filter between defined webhook records.
3. Registered Channels
Active bot name, connected platform, trigger event type and date of creation.
Enter the link information
Link step Bot Name, Avatar URL, Name and URL prepare the fields. Bot name postcide appears; use the ad space to distinguish the connection on the panel.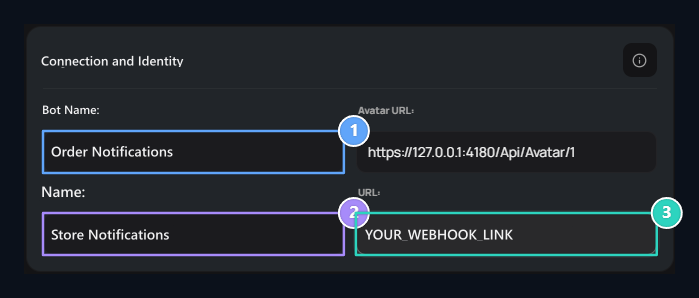
1. Bot Name
Type the name that will appear in the notice.
2. Name
Set a name that will distinguish this link on the panel.
3. URL
Enter your own webhook connection to send notifications.
Select the event to start the notification
Event Type open the step. Select the group related to categories and select which action of the notification will be sent.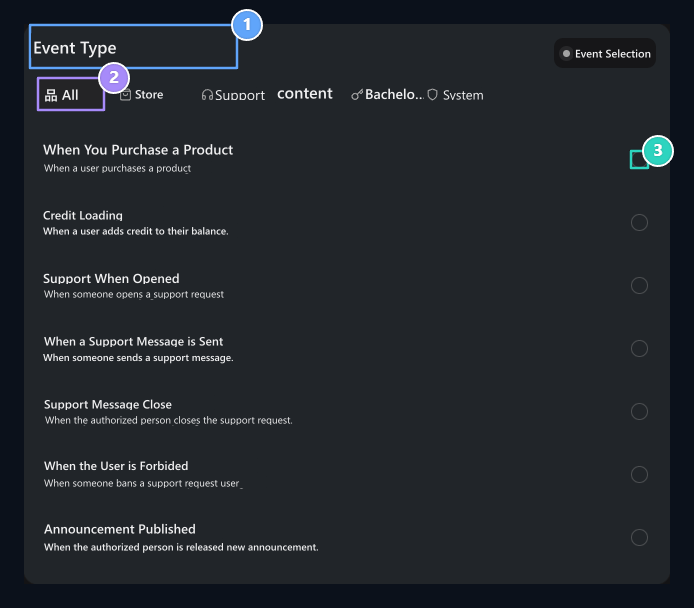
1. Connection step
Turn to Bot name and destination link settings here.
2. Event Categories
Filter between store, Support, Content, License and System events.
3. Event Type
Select an event like purchasing, credit loading or support to be sent from the notification.
Edit Message
Message Content fill in the fields in the step. Preview allows you to follow changes while editing the appearance of the message.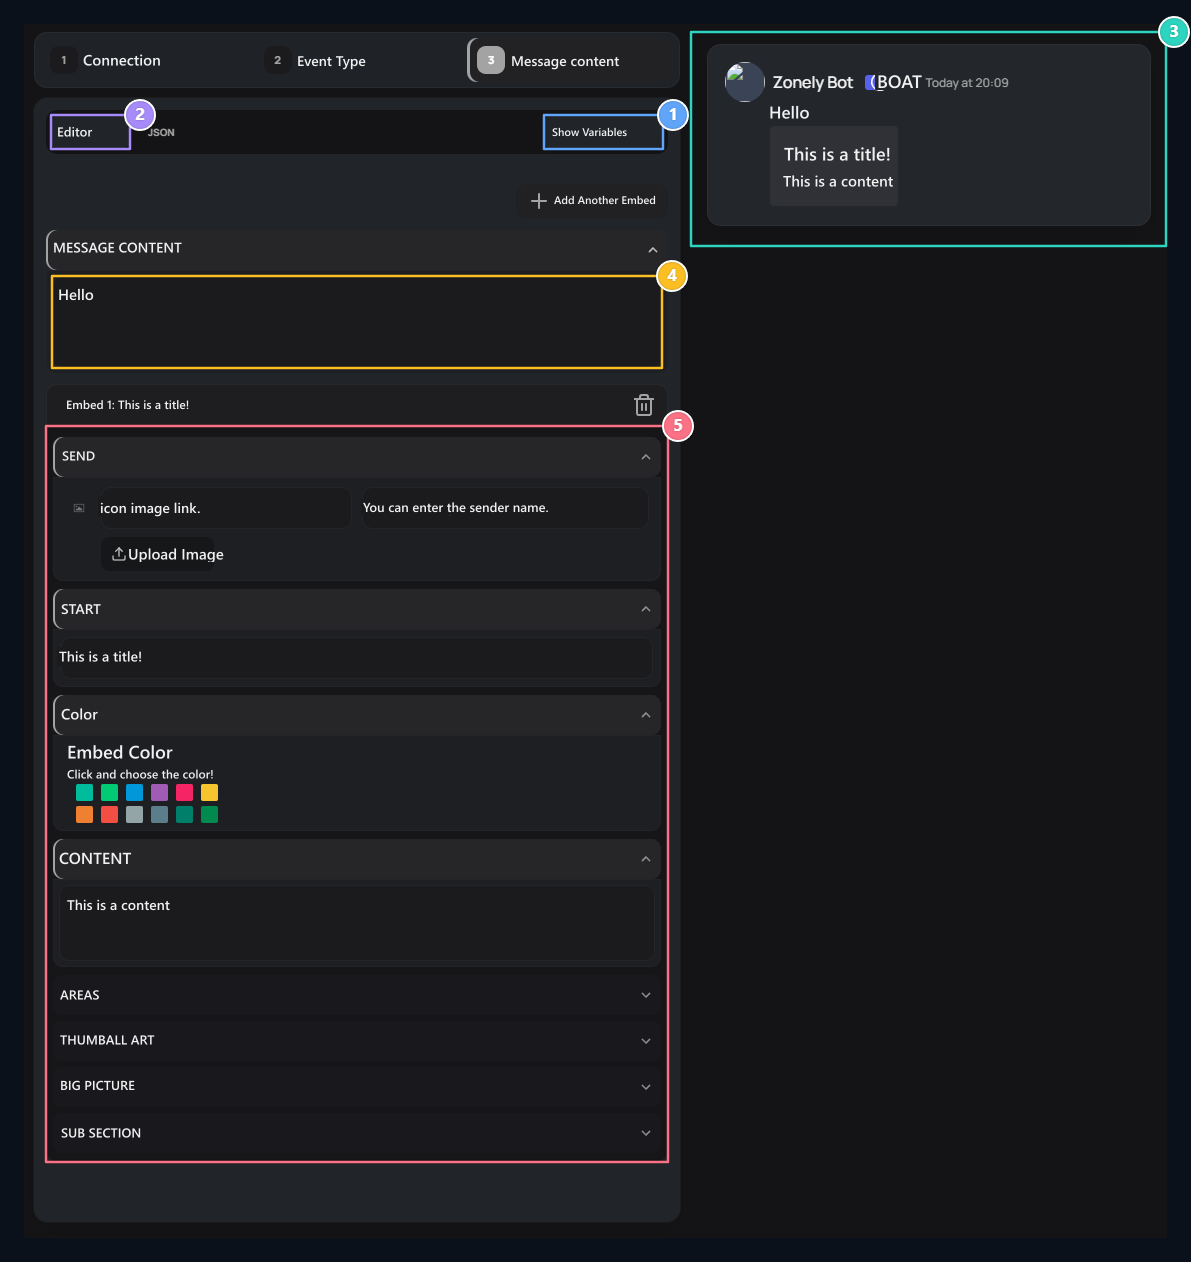
1. Show Variables
{username},{price},{product} opens dynamic variables guide like{product}
2. Regulatory and JSON
Edit with domains or switch between JSON template.
3. Live Discord Preview
Watch the instant how the message you create will appear on the Discord channel.
4. Post Text & Ping
Standard notification text or @everyone tag that will appear above the Embed card.
5. Embed Areas
Author (Author), Title, Description, Color, Thumbnail and Footer configuration.
Show Variables Get the values that are appropriate to the selected event from the button. You can use variables such as user name, product or amount in message. Add variables with the spell shown in the list.
I have a ready message template
I have a ready message template
JSON Paste your template on the tab. Check the areas and previews you’re turning to the editor look like you’re expecting.
Register a Notice
Review the link, event type and preview. Send Test Messagewith sample notice to the target. Publish creates registration; if the existing registration is issued Update Apply changes with.Discord Bot
Prepare server connection, bot settings and role matching.