 Home
 User Guide
 Developers
 Payment Gateways
 Integrations & Tools
 Site Usage
 Troubleshooting
Find out about auction
Default expand or narrow the server group in view. Open the trading menu of the relevant goods.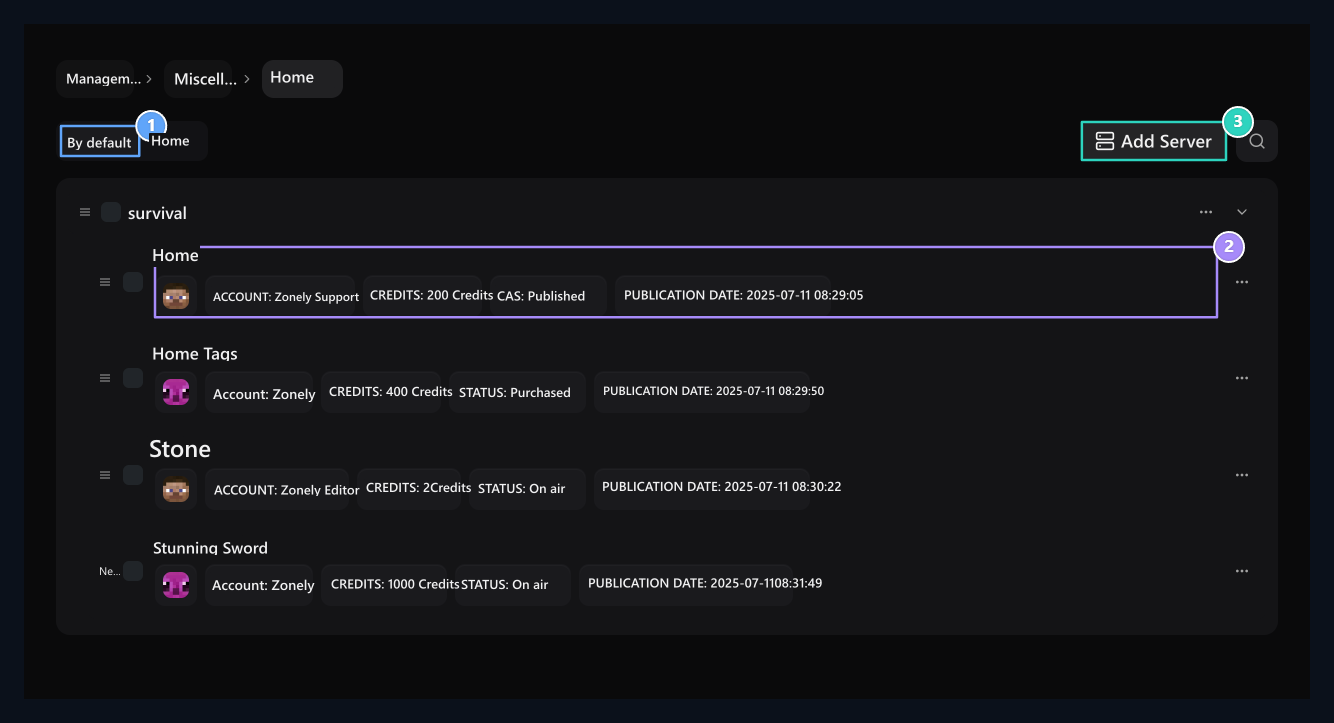
1. Default view
auction records are grouped according to their servers.
2. auction registration
Review the item name, account, price and status on the record.
3. Add server group
Add the server group to list the contacts.
Table view
Table view
Home Search by user or product in appearance. Check the server, the price, status and the date of publication.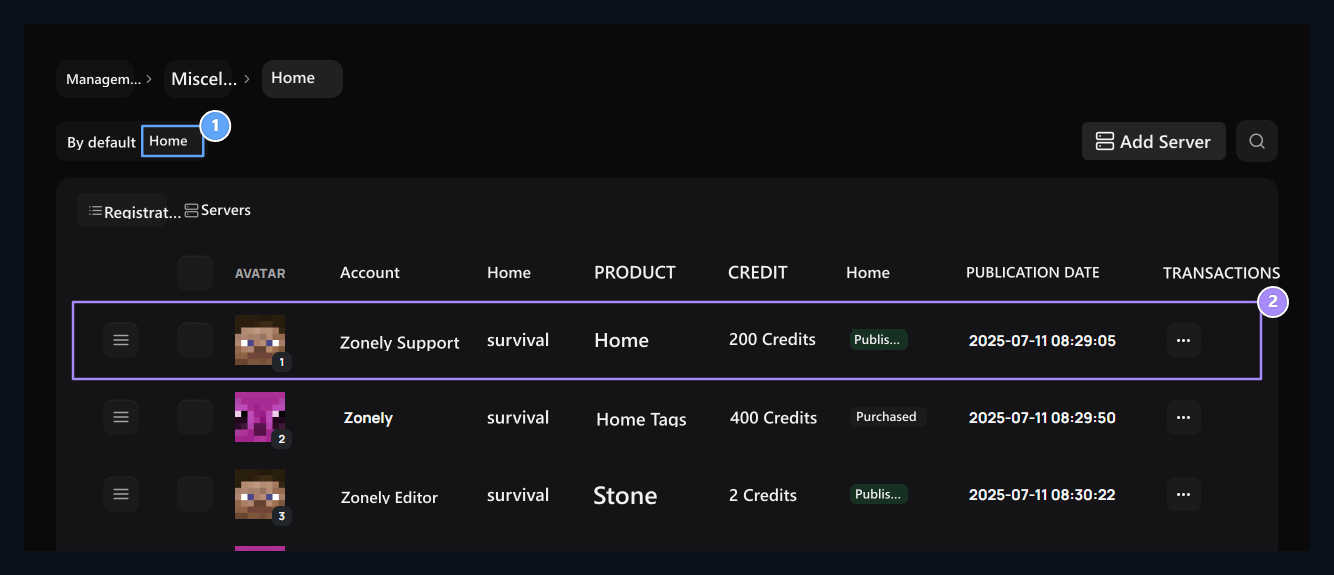
1. Normal table
See the same records in account, server, product, credit, status and date columns.
2. Compare registration
Check the server group, the price and the broadcast status of the goods.
Create a server group
Add Server Press the button. Command Server from the area Servers Select the link you prepared on the page. Add group name, description and visual.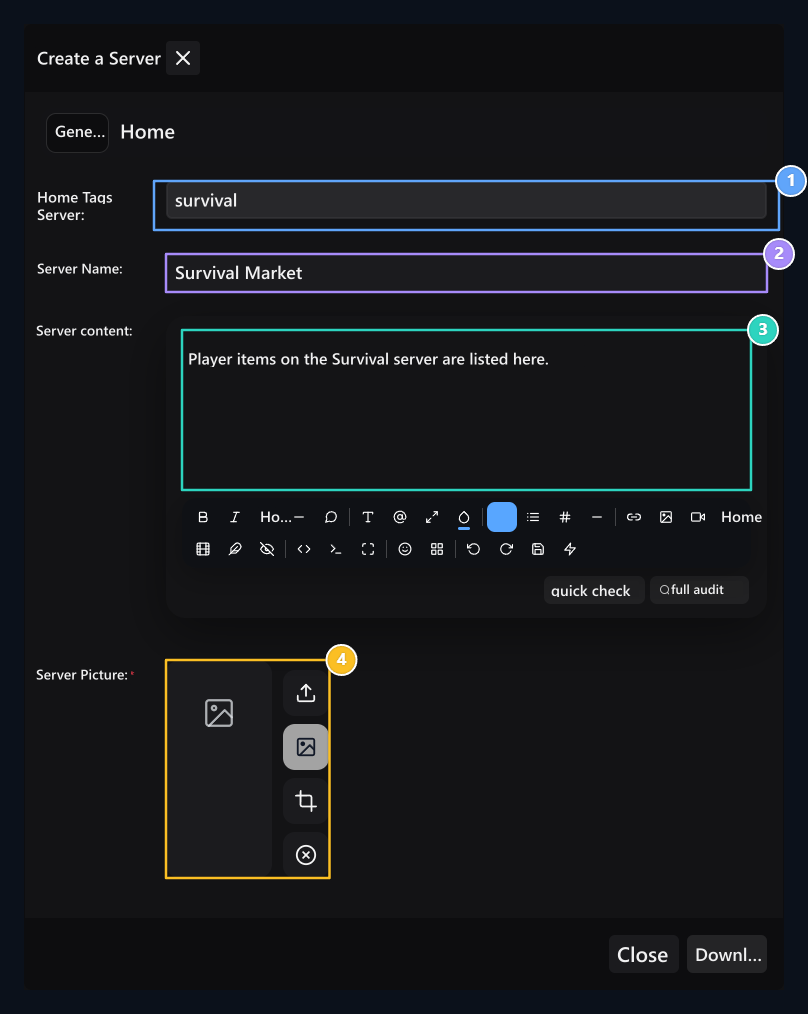
1. Command server
Select the registered gaming server that will be connected to the people.
2. Server group name
Type the name that will appear on the page of auction.
3. Server content
Write a brief description of the sale of goods in this group.
4. Server picture
Select the visual of the server card on the user.
Connect the group to the game
Minecraft server ZonelyCore must be installed. Match the database link of the plugin with your site. Open the group in your theme; get group number at the end of the address.
1. auction server ID
Type the number at the end of the auction group address in the open-server-id field.
Prepare in-game view
GUI On the tab Show in Game Open the option. Select Title, description and icon; if you are using special model Model Number enter. Publish Save group with.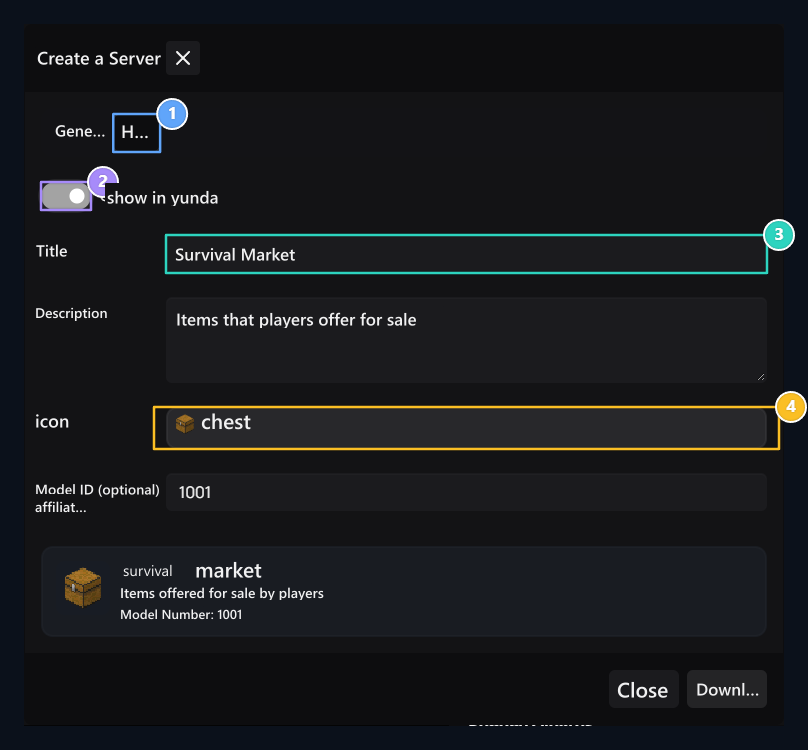
1. GUI tab
Edit the in-game menu information of the auction server group here.
2. Show game
Open this option if in-game appearance is used.
3. Title and description
Identify texts to be shown in the in-game menu.
4. Icon and Model ID
Select the item icon. Enter Model ID value if you are using special model.
Edit item record
Related goods three points → Edit open the way. Check the item, user, server and credit price; save the necessary changes.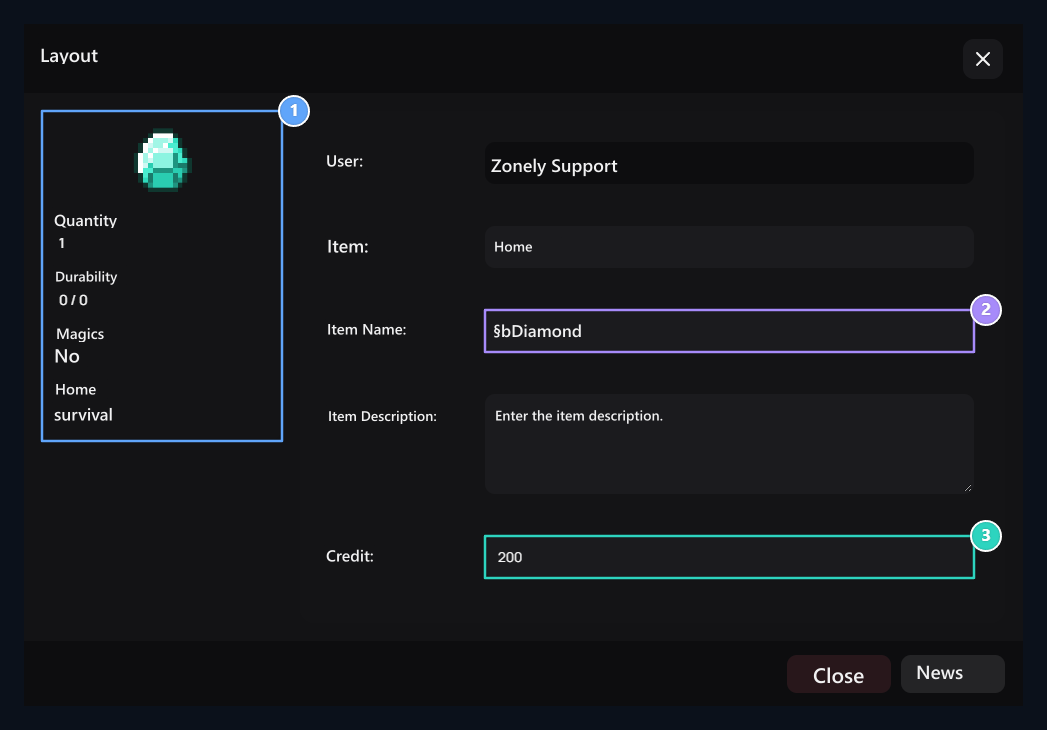
1. Item summary
Material visual, qty, durability, spells and server information here.
2. Item name and description
Check the items text to be displayed in the store.
3. Credit fee
Determine the amount of credit requested for this registration.
Your theme card
Your theme card
Check out the items on sale by opening the auction group. Customers see the seller, spells, aded and price of the goods Buy continues with.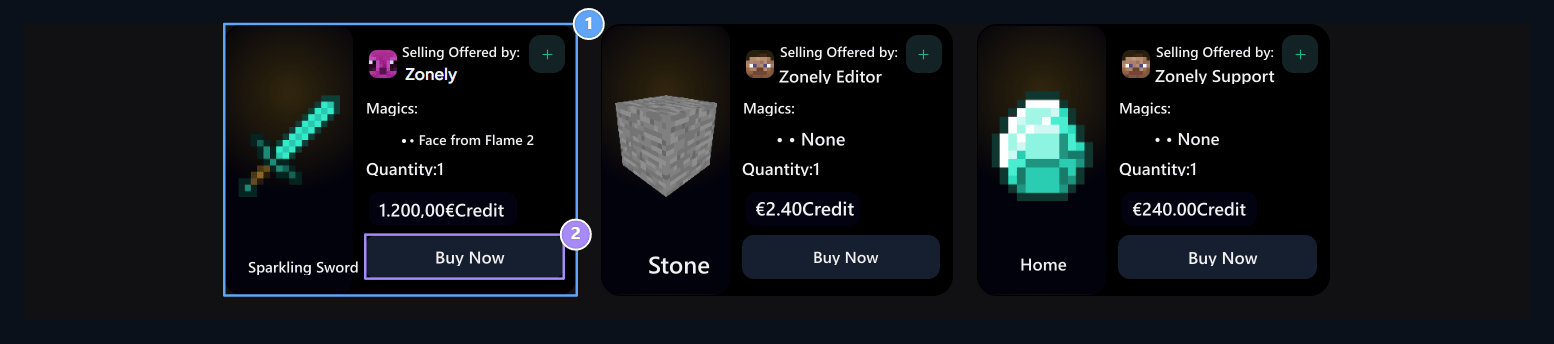
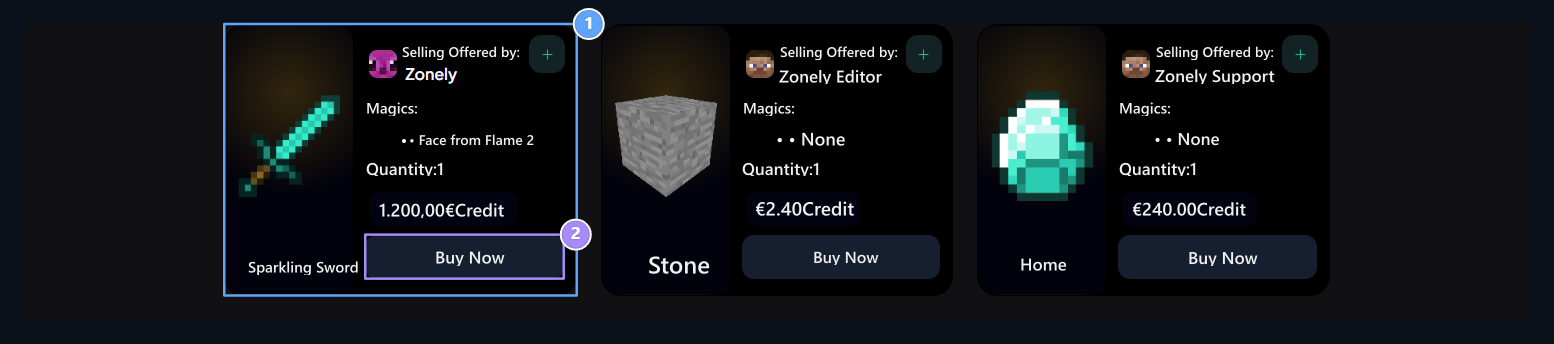
1. Personal card in the user
The item is shown together with visual, seller, spells, pieces and credit price.
2. Buy
The user is able to get the appropriate record from this button to the purchase step.
Can change the seller’s name and price
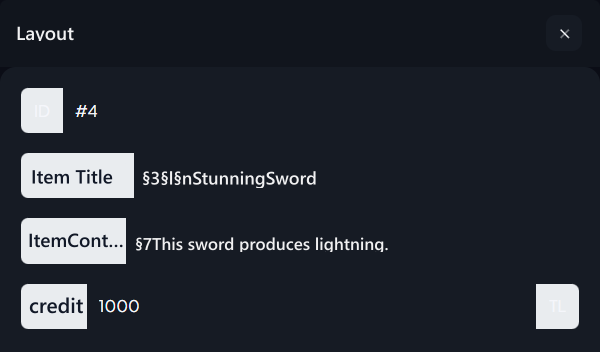
Seller, when the goods are on sale Profile → My orders Find and find out the record in person from the section Edit can print the button. The item can update the price until sold at any time.
- Item Title type the new item name that will appear in the store.
- Goods Content Edit the description in the field.
- credit Enter the new sales fee in the field.
- Under Screen Update Press the button.
Can transfer the buyer to the game later
Purchased in person, buyer Profile → My orders Add to the section. The user does not have to transfer if it does not buy; in the relevant item when ready Transfer To Game Can use the button.
- Login to the game server connected by the item.
- My orders in section Game transfer awaits Find the item in the case.
- Transfer To Game Press the button.
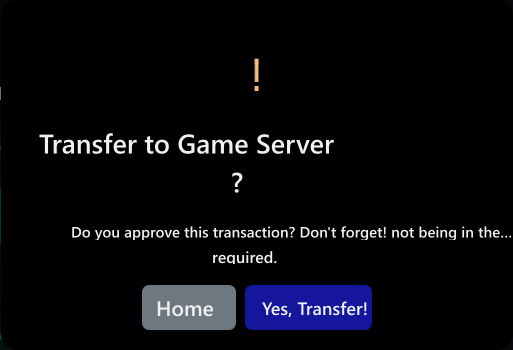
- Checking you are in the game and on the drop-down confirmation screen Yes, Transfer! Use option.
Show game transfer approval
Show game transfer approval