
 Home
 User Guide
 Developers
 Payment Gateways
 Integrations & Tools
 Site Usage
 Troubleshooting
Email sending with SMTP — recommended
Mail Settings window SMTP Select method. Enter your email provider’s server address, port, security type, username and password; prepare and save the sender name. Determine port and security type according to the instructions of your provider. Send an email to your own address after registering. Check password reset and email verification messages to recipient.Optional: Connect your Google account
Optional: Connect your Google account
Connect your Google account
Mail Settings as a shipping method in window Google Select. Use Google link button if the account is not connected.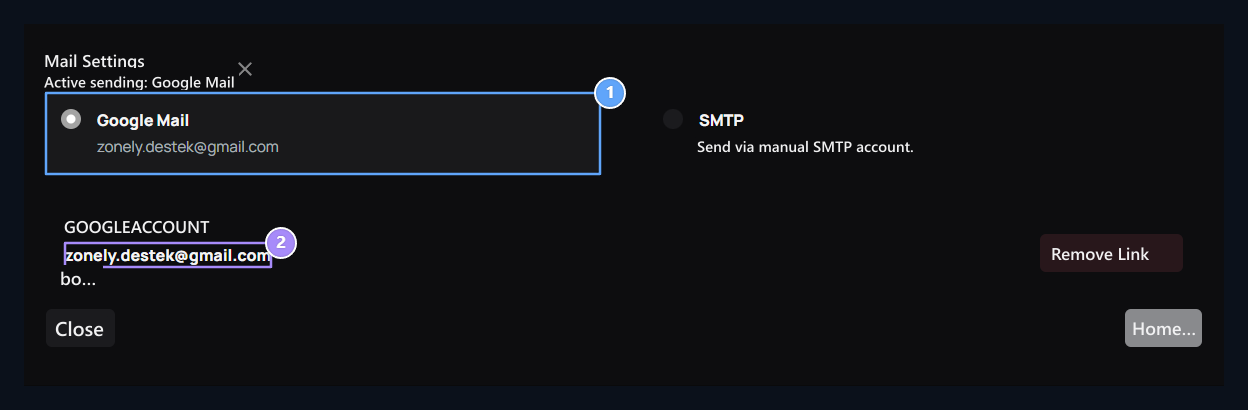
1. Sending with Google account
Gmail address appears connected in Google option. You can link your account here.
2. Connected address
Check your Google account for the submission.
“Google has not verified this app” If the screen is removed, the app states that it does not complete Google verification. If you rely on the app and developer shown onlysmall under the bottom Advanced open the link Go to the “zonely.gen.tr app (not safe)” You can continue with the option. Then check the desired permissions. Google’s description →
Check incoming and sent messages
Inbox Check the sender, topic and message summary on the tab. View you can open the message and answer. Posted Follow the messages transmitted from the tab.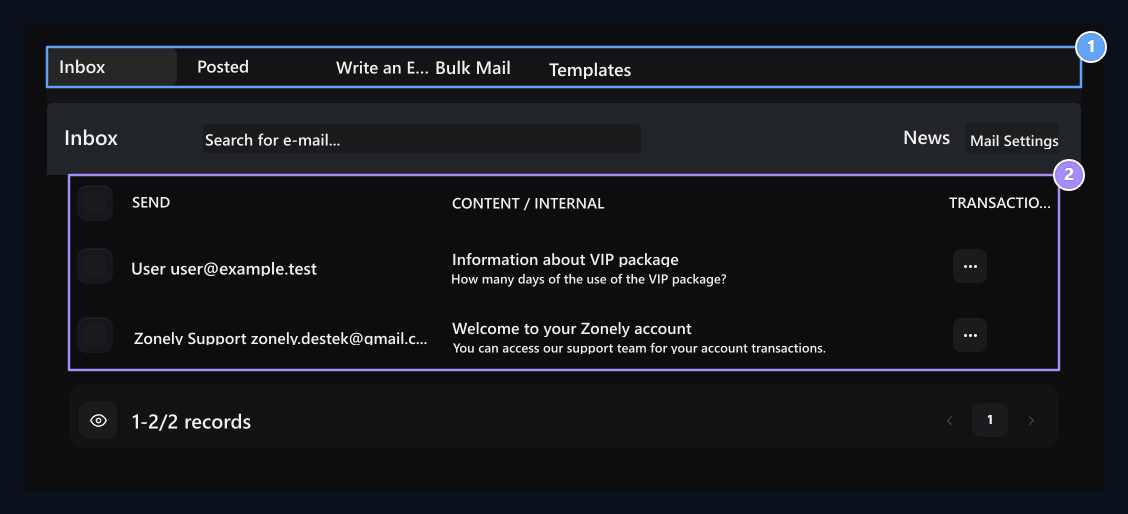
1. Email tabs
Incoming, sent, new email and templates are available on the same screen.
2. Inbox
Check the sender and the topic; open the message with the View.
Write new email
Write an Email Open the tab. Fill the recipient address, topic and message. Send When you press the button, the message is transmitted through the selected shipping method.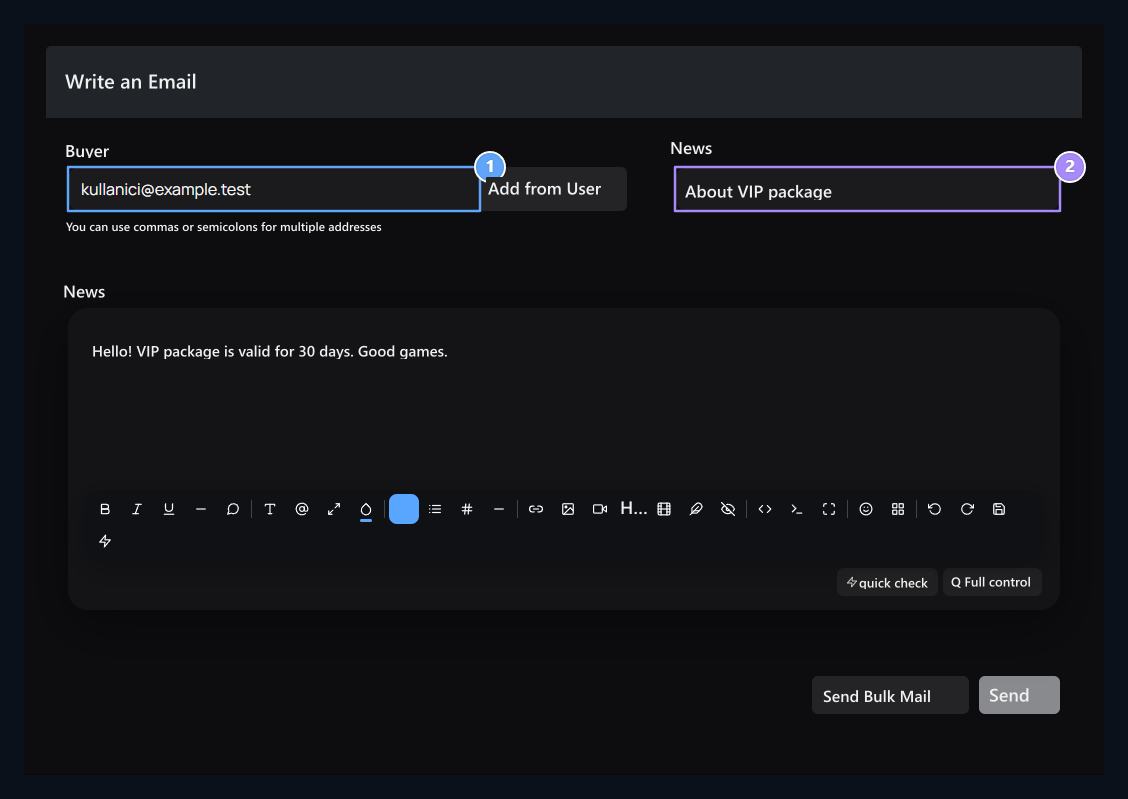
1. Receiver
Write the email address that the message will reach.
2. Subject and message
Complete header and content and transmit it from your affiliate account with Send.