
 Home
 User Guide
 Developers
 Payment Gateways
 Integrations & Tools
 Site Usage
 Troubleshooting
Find the user
Type the user name in the search field. Check the credit balance, last entry and registration date of the account in the list. Related Line three points open the menu.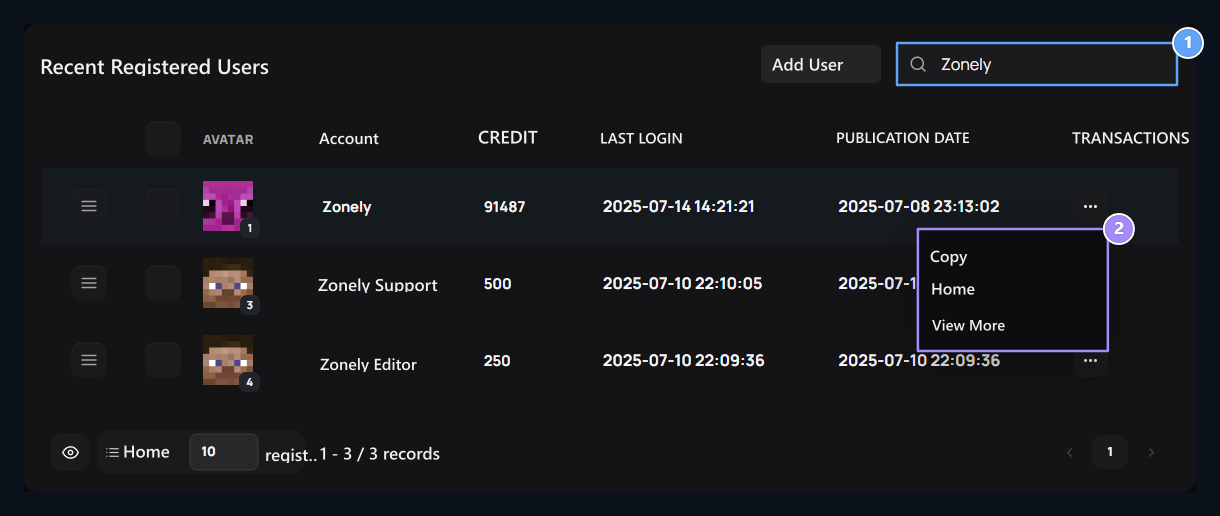
1. User search
Find the user about typing the account name.
2. Account transactions
Open the details, order and history with the Edit.
Edit account information
From the user’s trading menu Edit Select. After changing the areas, under the screen Update Press the button.User name and email
UsernameThe name used on the site of the account. Email type email address for account. If the names and surname areas are used in the registration settings, this information is also located on the same screen.
1. User name
Type the username that will appear on the site of the account.
2. Email
Enter the email address to be used for the account.
Change password
New password Password again, the same password Password (Repe) enter the field. Make sure two areas are the same Update Press the button.
1. New password
Enter the new password for password change.
2. Password repeat
Type the same new password again.
Credit and two-stage verification
creditindicates the user’s current site balance. Use this space to edit the amount. To send credit to the user Manage User → Send Credit open the process. 2FAThe two-stage verification status of the account. Open and Closed Select the status that the account will be used from the options. Changes Update Save with.
1. Credit balance
Edit the current credit amount of the account.
2. Two-stage verification
Select Open or Closed status for 2FA.
Give user role, credit or product
List three points → View open the way. Manage User buttons on the top of the screen open the processes for your choice.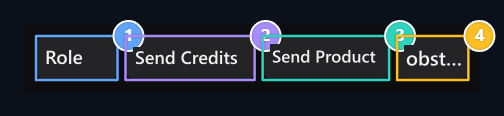
1. Role Ver
Open the role appointment process to the selected user.
2. Send Credit
Open this account credit sending process.
3. Send Product
Open to identify products to the user.
4. Block
Switch to the blocking process of the account.
- Cast A Role
- Send Credit
- Send Product
- Obstacle
Select the role to the user and complete the role of giving part. Role site permissions, game authorizations and duration Roles prepared from the section. User assigned roles under account summary Roles Check in the card.
View account summary
In the user card right Total Spending, available credit, Last Seen and Registration Date You can see the information together. Registration IP and IP Type fields are shown if there are such information that belongs to the account. Gold Roles lists the assigned roles of the card user.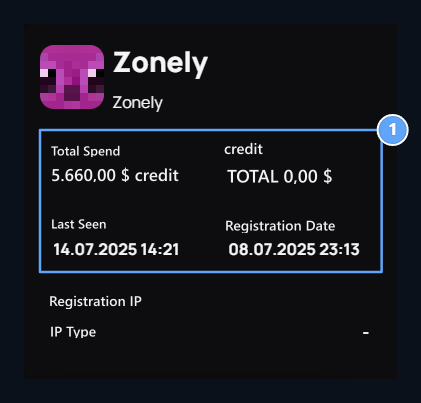
1. Account summary
Check out the total spending, current credit, last sight and registration date together.
Follow orders
All OrdersLists orders only to the user you open. Check product name, total amount, payment method, status and date together. Use the search and pageing areas of the table if there are multiple records.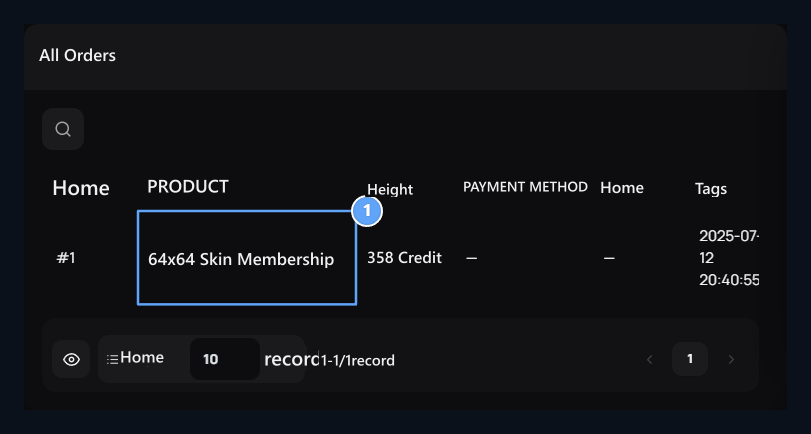
1. Order registration
Compare product, total amount, payment and date information.
Open product and license operations
Products expand the part. In this table you will see the product, total amount, license status, renewal date and registration time of the user. Related product three points open the menu.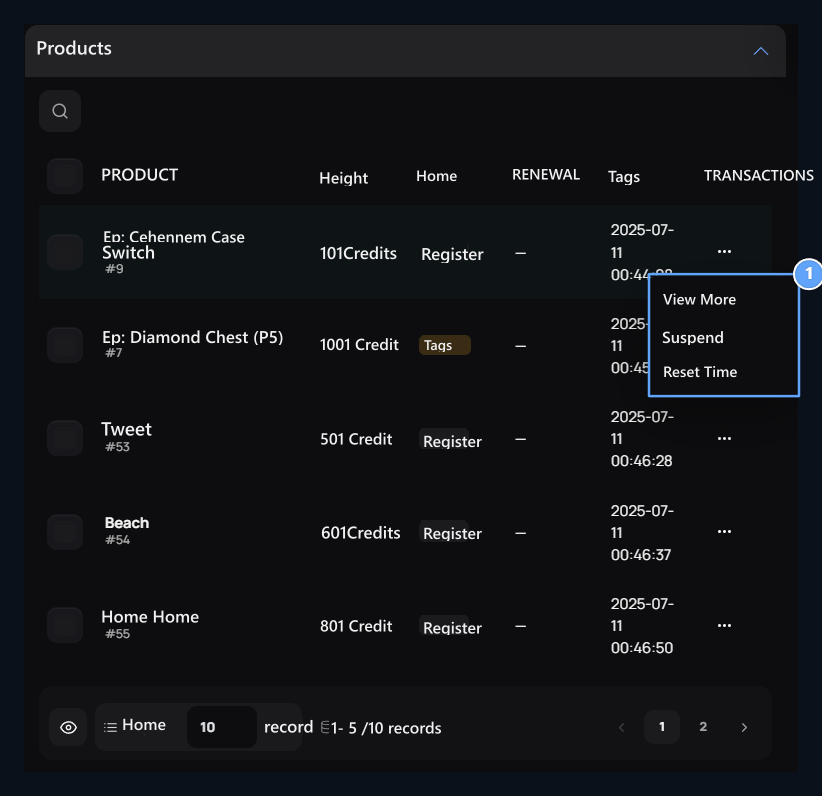
1. License operations
View, Take Hanger and Reset Time options here.
According to the type of product and the current state Refresh, Get Processed, Transfer To Game or Move Product Additional options may also appear. Scroll to check the description and confirmation screen of the processing you will do.
View credit upload history
Credit Load History open the part. Compare the amount of credit added to the user, the type of transaction, the payment information and date in the same line. Use this information together when you examine how a upload burns the balance of the account.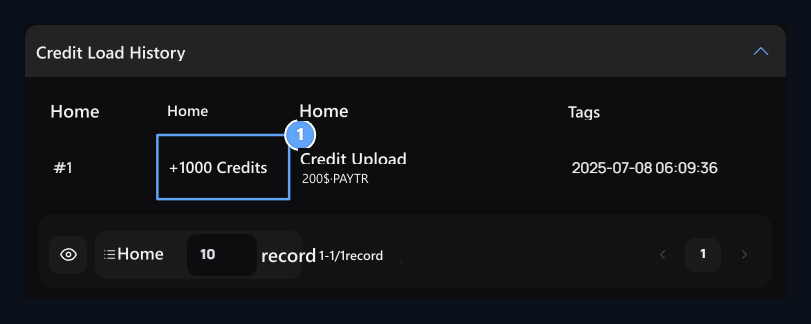
1. Credit loading
Read the added credit, transaction description and date together.
Open support and other pastes
Opened Requests In the section, this user is involved in support issues. Check the header, category, status and date of the topic. For the details of support operations Live Support Go to the guide.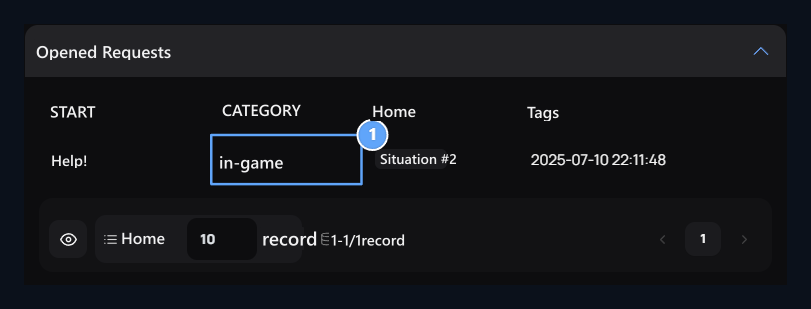
1. Support request
Check the user’s open topic, category, status and date.
Other past sections
Other past sections
Open the list by expanding the relevant header. Every past is shown according to the user you open the management screen.
Create new user
Go to the list Add User Press the button. Enter the username, email address and password; type the password again. Complete other account areas that appear and create user with the registration button under the screen. Then check the list by calling the new account.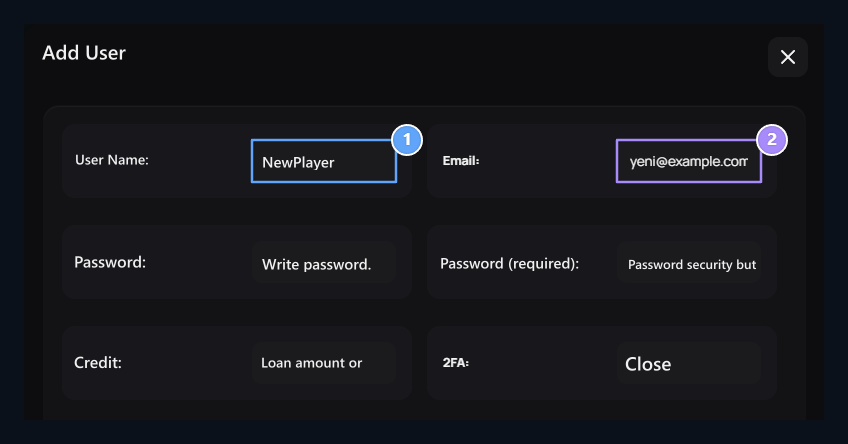
1. New user name
Type the name of the account that will be created.
2. Email of the account
Enter the email address of the user.