
 Home
 User Guide
 Developers
 Payment Gateways
 Integrations & Tools
 Site Usage
 Troubleshooting
Are you ready for domain name?
1
Prepare your domain name
Use a domain name registered on your own name. If you haven’t yet received domain name providers Check out. You can use the domain name you receive from IHS, Turkcommerce.net, GoDaddy, Cloudflare Registrar or another provider.
2
Check the domain name in your license
Your Zonely account Name of the domain registered in your license Check the information. If a different address looks change domain name. Domain name
https:// and www type without adding.Cloudflare and nameserver connection
Cloudflare account Login and proceed to where you get your domain name.- I bought from another provider
- I purchased my domain through Cloudflare Registrar
1
Add your domain to Cloudflare
Add your domain name Free Select plan. Review existing DNS records.
2
Change nameserver addresses
Copy two nameserver addresses that Cloudflare gives you the domain name. Company who purchased domain name Nameserver / DNS Servers enter and save these addresses in the section.Write these addresses not as the CNAME goal, but the nameserver areas of the provider.
3
Wait for the effectiveization of the domain name
Domain name in Cloudflare Active When you have DNS logs. Pending If the nameserver change has not been completed yet.
Add two CNAME records
Select your domain name on Cloudflare DNS → Records → record Add Add two records below:@ represents the root domain, while www represents the address beginning with www.. If your Zonely connection helper shows a different target, use that value.
@ or www Edit corresponding registration if there is a confectionary A, AAAA or CNAME registration for example. Protect records of email and other services.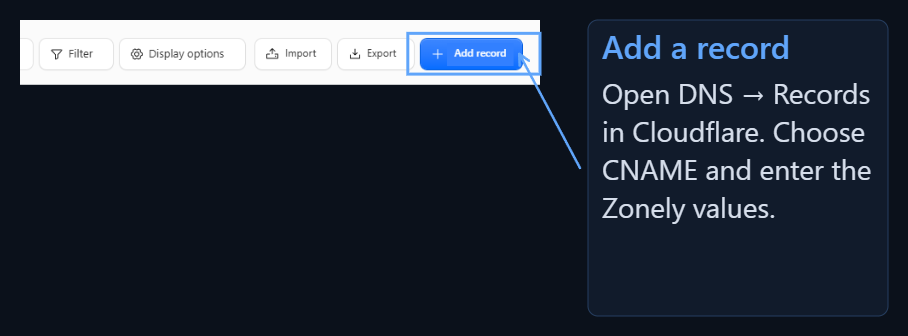
Complete SSL/TLS settings
1
Select encryption mode
SSL/TLS → Overview In the section specified in Zonely connection assistance Full Price Select mode.Full (strict) They also verify server certificate. Make sure that the server certificate meets the terms of the server certificate if you are going to use this mode. Full Price · Full (strict)
2
Check the certificate
SSL/TLS → Edge Certificates in section Universal SSL Certificate Active Wait to be.
3
Open HTTPS redirect
When the certificate is ready Edge Certificates → Always Use HTTPS Open the option.
Open Address in browser
Your own domain namehttps:// open with. Both the main address and www Check the address starting with. Confirm and confirm the settings you do if you use Zonely link assistance Complete Installation Press the button.
My Site wasn’t Opened
My domain shows Pending in Cloudflare
My domain shows Pending in Cloudflare
Compare nameserver addresses in your domain name provider with two addresses that Cloudflare has given on this domain name. Wait for the activation if you have done new changes.
Domain name is active but the site does not be turned on
Domain name is active but the site does not be turned on
Name and name of the field in your license DNS → Records in the section
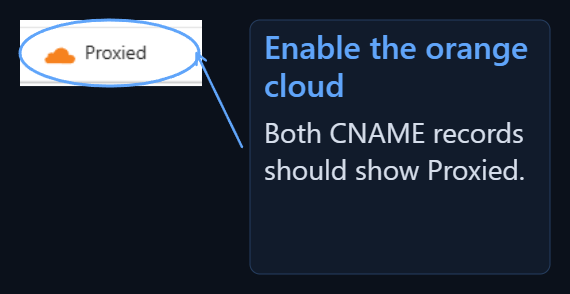
@ with www Check records. Two records must go to the correct Zonely target and Proxied must.HTTPS or certification error seems
HTTPS or certification error seems
SSL/TLS → Overview mode and Edge Certificates Check the certificate status in the section. Universal SSL certificate Active Wait to be.
Settings are correct but the old result looks
Settings are correct but the old result looks
Try again from the hidden tab or mobile internet connection. DNS changes may take time to reflect.
How long will DNS and SSL be ready?
These times may not start at the same time. Nameserver duration · Universal SSL time
Do not change the nameserver addresses again while waiting. If there is still problems at the end of the specified time above controls Review and support from the relevant provider.
If your site is opened to install the first site You can.