
 Home
 User Guide
 Developers
 Payment Gateways
 Integrations & Tools
 Site Usage
 Troubleshooting
Find out more
Managementis category, package and advertising tree. Past AdvertisementsShows ad logs and statistics. Advertising Areasrules of settlement and media; Settings,approve,filter and AdSense preferences.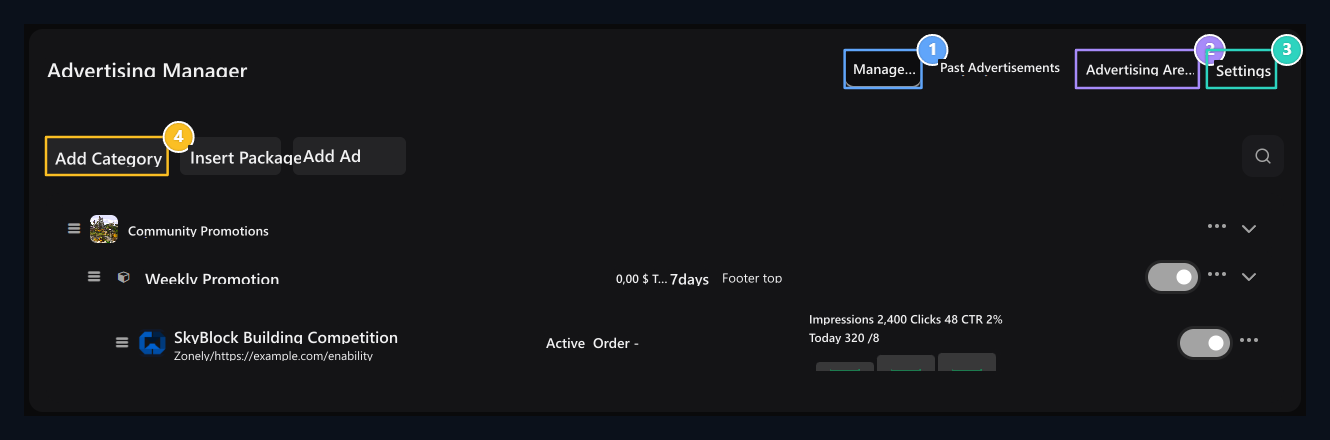
1. Management tab
The management tree consisting of categories, packages and advertisements is located here.
2. Advertising Areas
Identify where and what rules will appear on the site of the ad.
3. Settings
Edit the approval, filter and AdSense options here.
4. Add Category
First prepare your category, then pack and advertising.
1. Create ad space
Advertising Areas → Add Area open the way. Domain name Define location with. Code fieldFOOTER_TOP type unique short code like; settlement Select the real impressions of the site from the list.
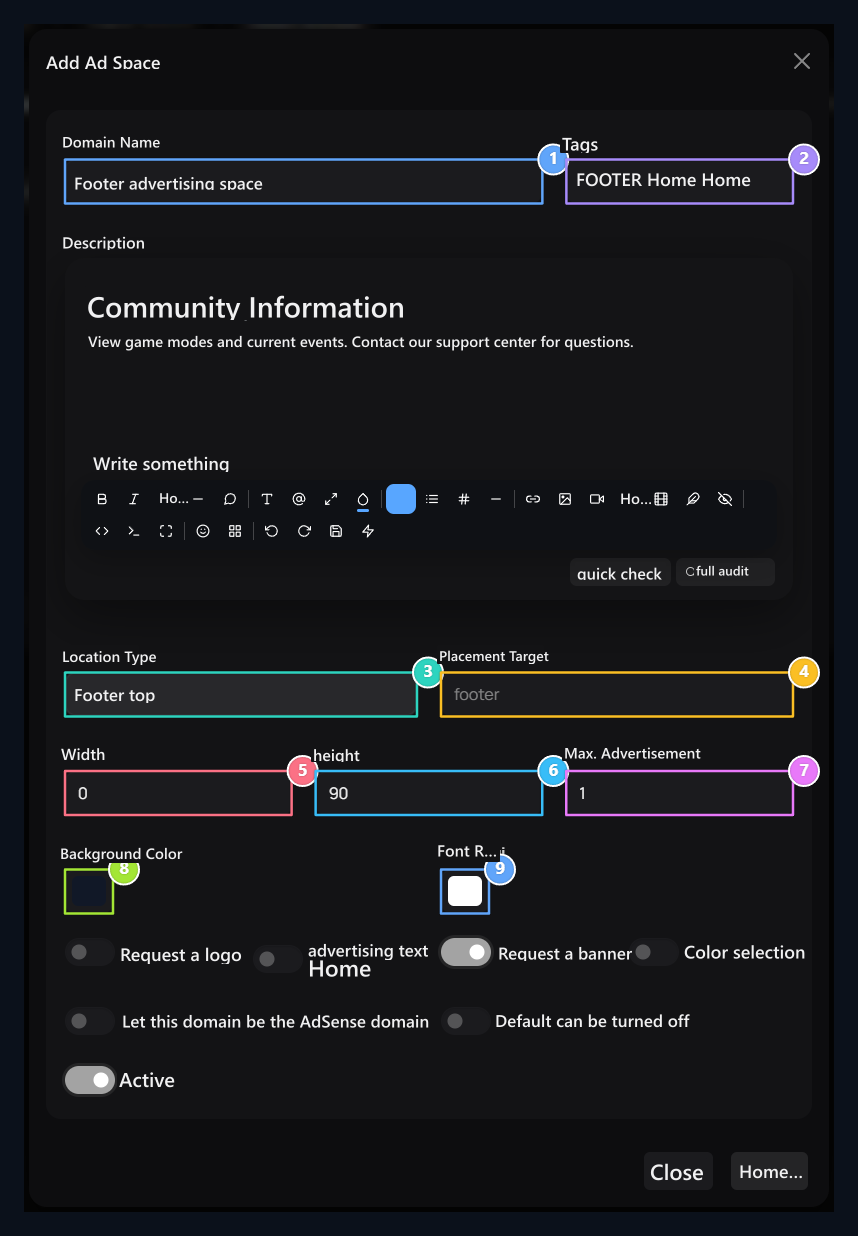
1. Domain name
Give a name to know the settlement in the list.
2. Area code
Unique short code that defines space.
3. Placement
Select the display location like upper rod, header six, popup or footer.
4. Special selective
Specifies the target CSS selector if you need special layout.
5. Width
Set the pixel width to be used for the field.
6. Height
Specify the pixel height of the visual area.
7. Field rules
Size adjust the ad and visual/text permissions to show at the same time.
8. Default floor
Select the starting color of the ad floor.
9. Default font color
Make sure the text read on the floor.
2. Add category
Management → Add Category open the way. Name, DescriptionOptional visual and Active complete the fields. You can collect similar packages under this category.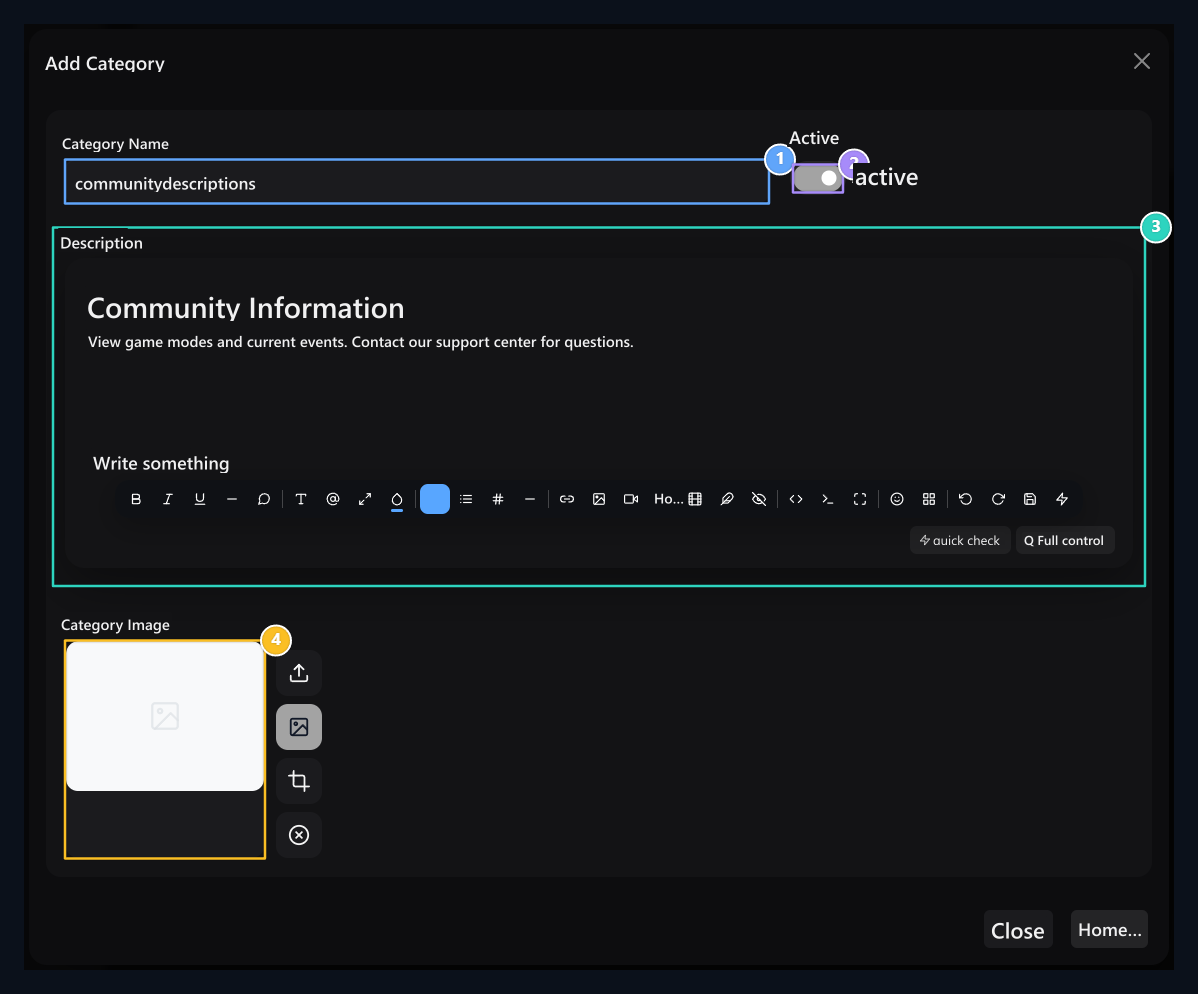
1. Category name
Type the header that will show similar packages together.
2. Active category
Activate the category to use packages.
3. Description
Explain the use of the category with a short text.
4. Category visual
Select visuals if you want; check and save the activeness.
3. Prepare ad pack
Add Package button opens three tabs form.General information
Package Name, Category and Description fill in the fields. Type of charge can be free or paid. Paid selection Price type the amount in the field. Active Set the availability of the package.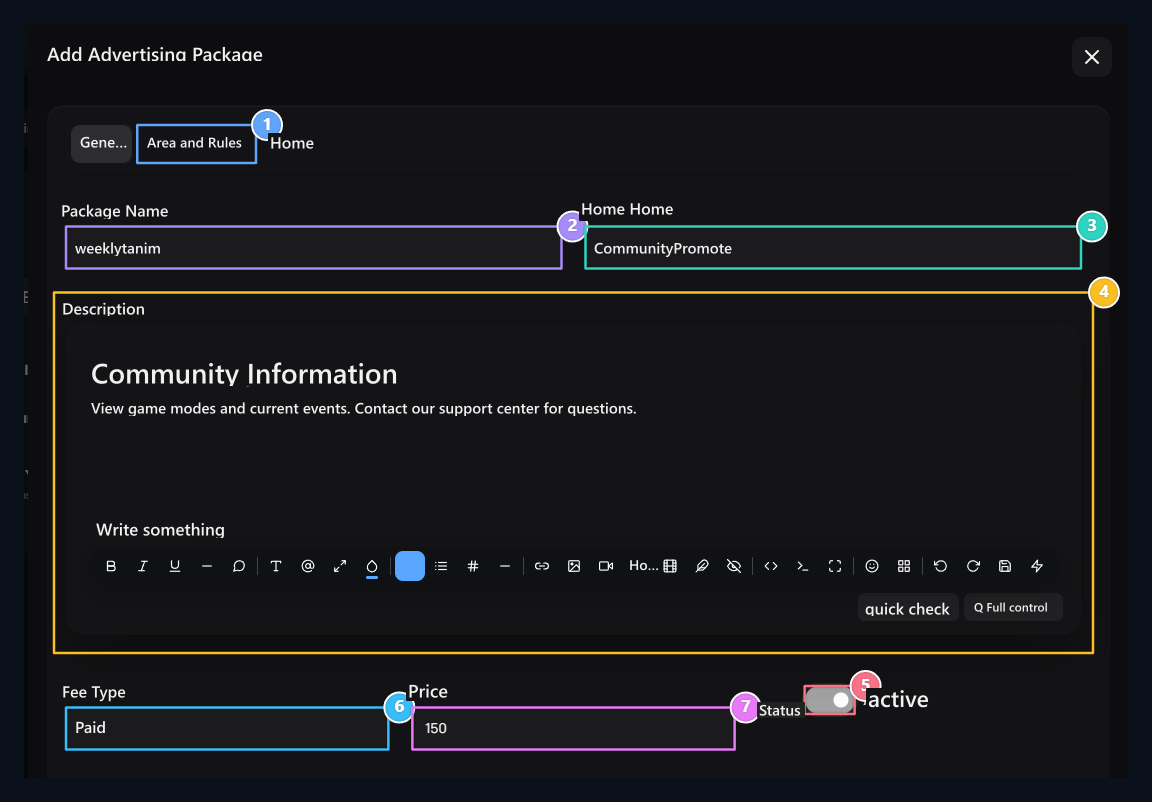
1. Field and Rules
Set the placement area, time and limits on the next tab.
2. Package name
Name the user’s package in a clearer way.
3. Category
Select the pre-existing ad category.
4. Description
Tell the user what is available with the package.
5. Active
Set the availability status of the package.
6. Charge type
Select free or paid; enter the price if paid.
7. Price
Type the sales amount of the paid package.
Area and Rules
You created in advance Advertising area Select. Visual and text rules of the space are transferred to the package; check them from the information box.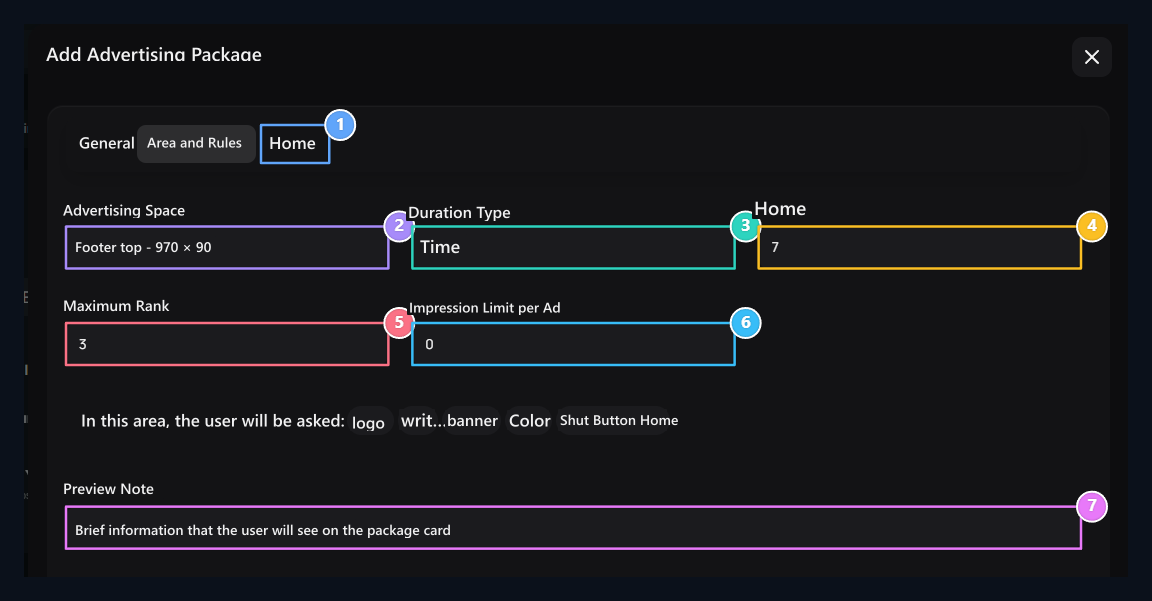
1. Template
In the last tab, the package has HTML appearance and variables.
2. Advertising area
Select the space connected by the package; media permissions come from the field.
3. Time type
Set the duration or duration of use; enter the number of days if the period is duration.
4. Number of days
Specify how many days the periodic package is used.
5. Tail and limit
Set the maximum tail and display limit separately.
6. Display limit
Set the total viewing limit to the package.
7. Preview note
Add a description to the user about the appearance of the package.
Åtemplate
Åtemplate Prepare HTML view of the package on the tab. Check the spelling of areas such as header, logo, URL, text, background and color from the variable list on the top. For example{{title}} header, {{url}} used to place the target address.
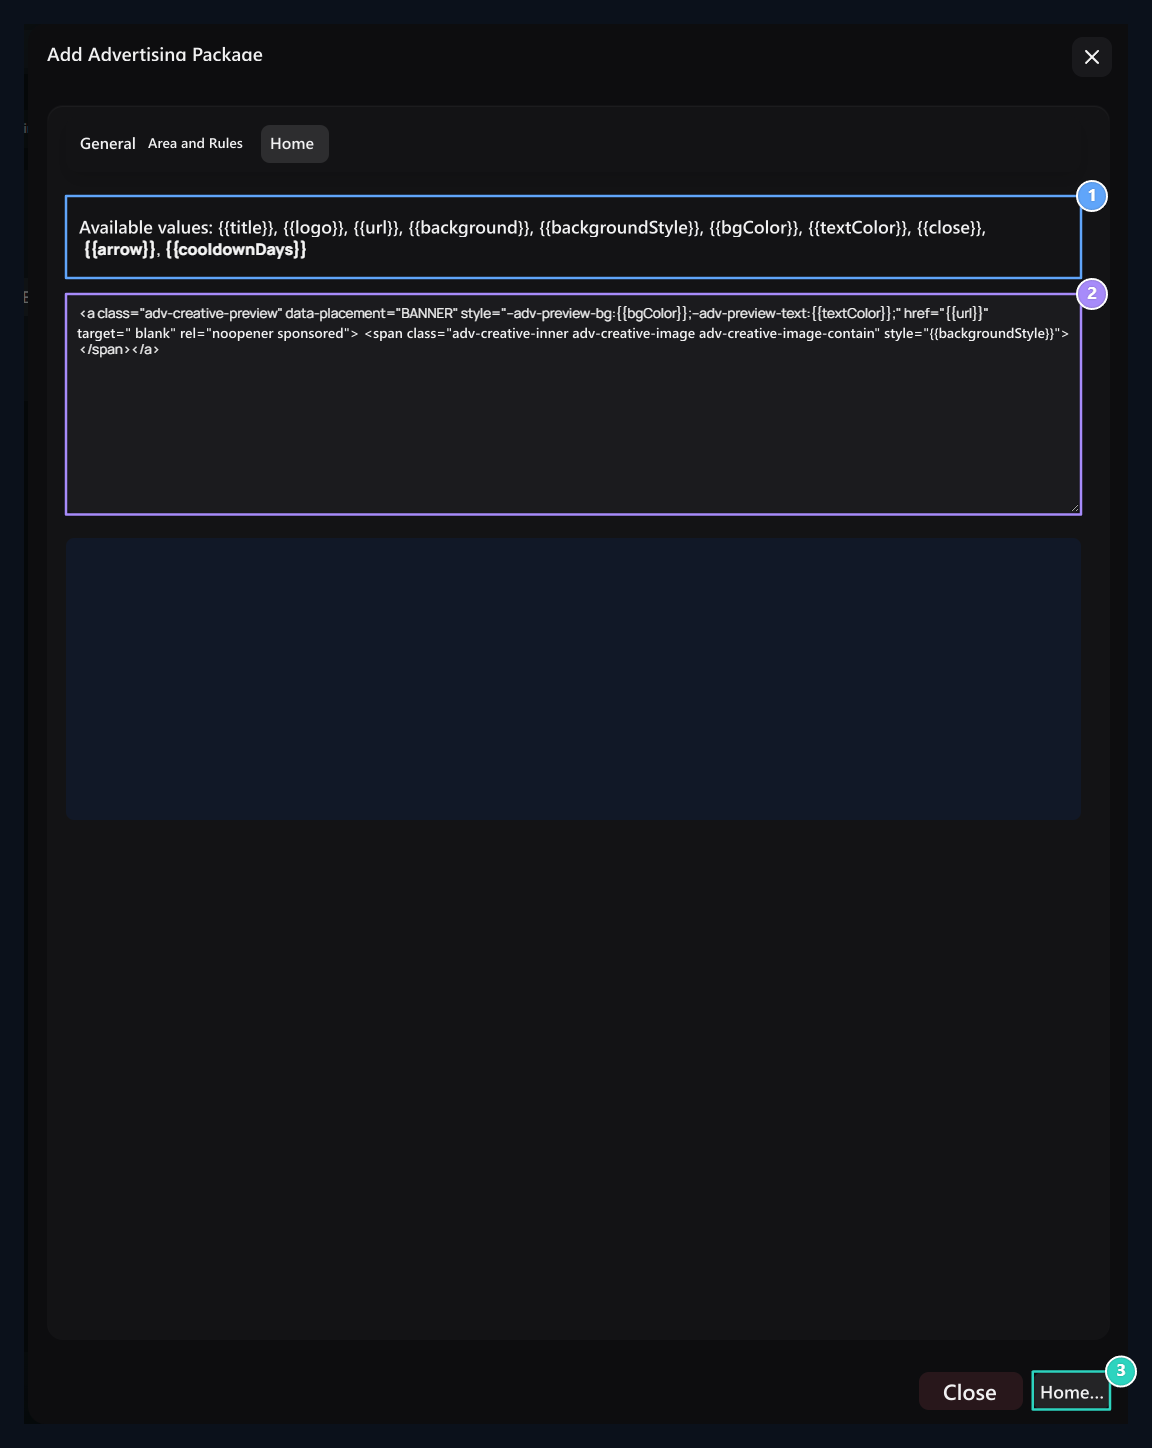
1. Template variables
Title, logo, URL and appearance variables are listed here.
2. HTML template
Edit the ad view of the package; protect variable names.
3. Save Package
It records all of the Template tabs with the General, Area and Rules.
4. Add ads to the user
Management → Add Ad open the way. Search and call the user by typing at least two characters Package Select. Package selection determines visual and text fields to be used.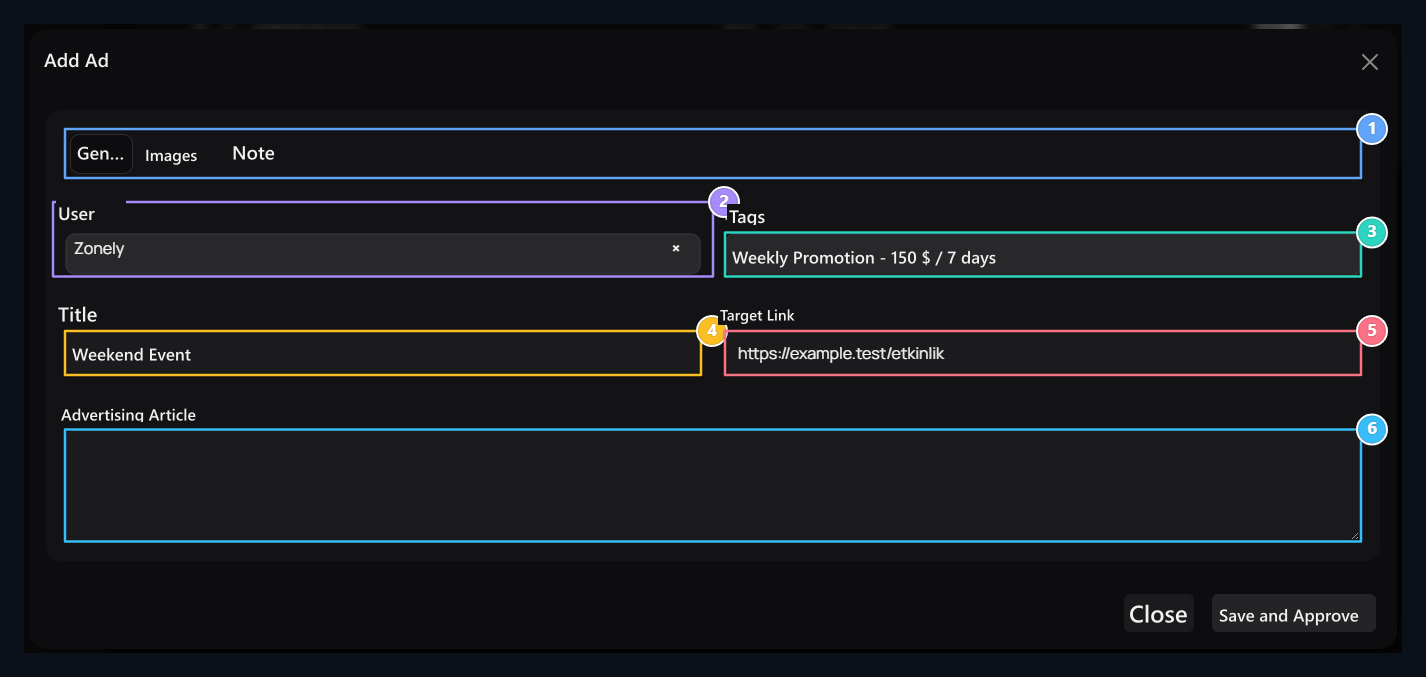
1. Visual and appearance
Visuals are opened according to the package; edit the revision note from the Note tab.
2. User
Select the account that the ad will be owned.
3. Package
Select the package you have prepared in advance; the available areas are dependent on the package.
4. Advertising header
Write the visible title of the campaign.
5. Target address
Type the full link to open when the ad is clicked.
6. Advertising text
Type your announcement if the package allows text use.
Manage status and statistics
Move from category, package and ads handles in the management tree. Package depends on category, advertising package. After leaving, the order and relationship automatic savedCheck the result notice. Do not mix with separate order saving on the Advertising Areas tab. The only ad with the active key of the package is different from the approval/write status. Edit the corresponding record according to what area you want to close temporarily. Past Advertisements Check the records on the user tab, package and status. Display, click, CTR and date information help you evaluate the performance of advertising.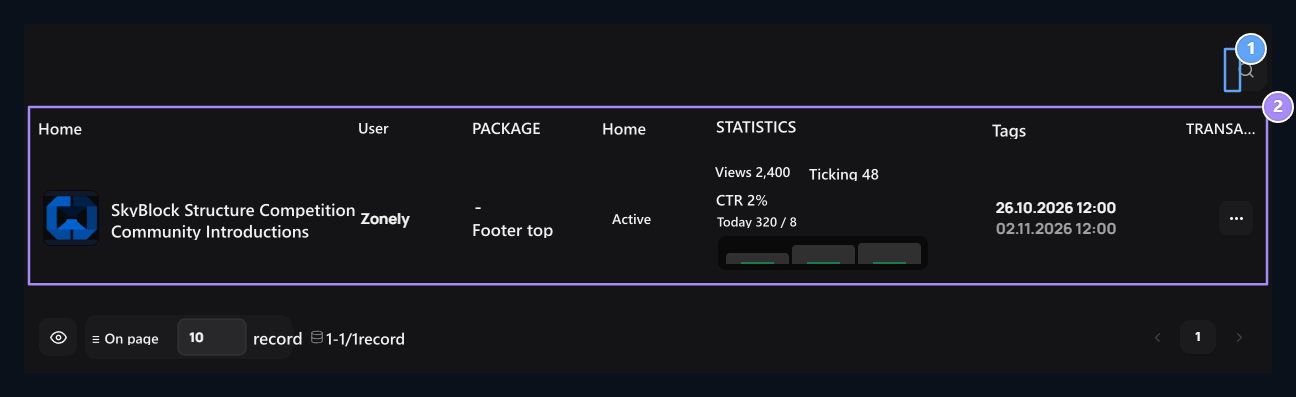
1. Search for advertising
Sign up for user and content.
2. Status and statistics
View, click and date information.
5. Set approval and filters
Settings Open the tab. Let user ads be approvedthe approval process of user content; Get free ads automatically queueddetermines the preference of free records to be ranked.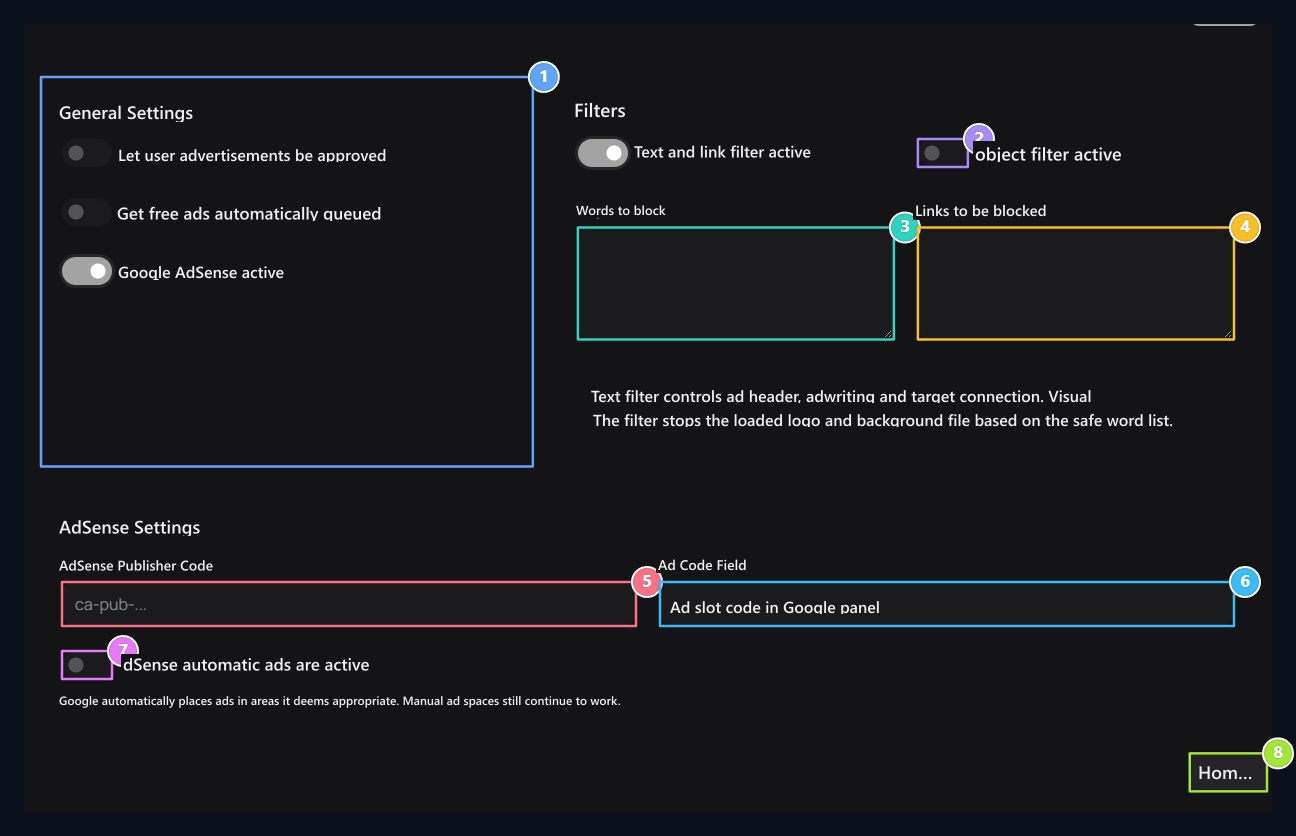
1. Confirmation settings
Set automatic order of approval and free ads.
2. Visual filter
Separate the visual filtering preference from the text filter.
3. Content filter
Type the word and domain names to the corresponding boxes.
4. Connection filter
Specify domain names to be controlled in content filter.
5. AdSense information
If AdSense is open, enter the broadcaster and advertising field codes from your own account.
6. AdSense domain code
Enter the code of the ad space in your account.
7. Automatic ads
Identify the AdSense auto ad preference.
8. Save Settings
Save options on this tab with button on the bottom.