ZonelyWebSender is with the console of the Minecraft server commands from the site. The site connects to the plugin in port connection; the plugin in the portless connection works from the site.

Install the plugin

From Official publications Download JAR file. plugs/ Put it in the folder and formed in the first beginning Plugins/ZonelyWebSender/config.yml open the file.

Select the connection type

With a port · config.yml
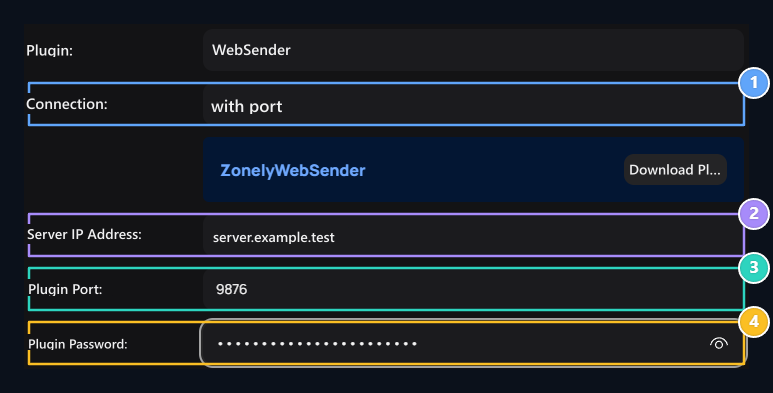
socketPortTCP port that separates your hosting for WebSender. socketPasswordThe common password you will use on the panel.Connection mode, Server IP Address, Plugin Port, Plugin Password

1. Connection mode

Match with port or portless selection on the plugin.

2. Server IP Address

Enter the counterness in your server configuration.

3. Add-on Port

Enter the counterness in your server configuration.

4. Plugin Password

Enter the counterness in your server configuration.
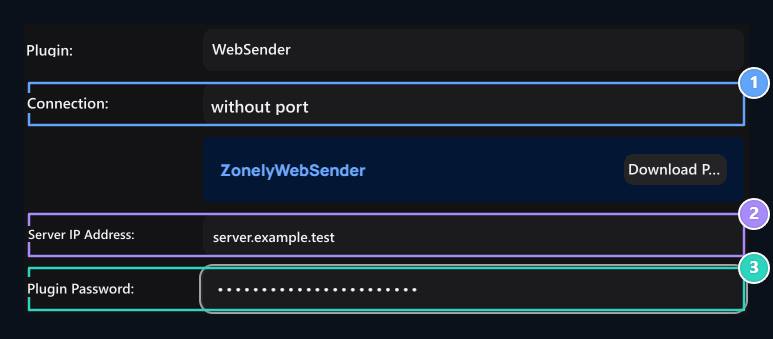
Create panel record

Management panel Store → Servers open the part. Add new server or edit the corresponding record. As a vehicle websenderSelect the mode you use on the plugin as a link. Match address, TCP port and password in port mode. Use the same common password in portless mode. Save the file and restart the game server. Select the registration you prepare as a delivery server of the product. Use connection control on the panel. If there is timeout on port connection, you can compare TCP access and port; site address, HTTPS access and common password in portless mode. If the connection is installed, but if the product does not deliver, check the server selection and console command. Project and configuration · Servers · Connections and tools